An outdoor kitchen with grill works or fails on one thing: what sits on either side of the grill. The grill itself takes 30 to 42 inches of counter. The cook then needs a place to set down a platter of raw food on one side, a place to land the finished food on the other, and a clear patch of patio behind them to turn around in. Plan those three things first and almost any shape works, from a straight 8 foot island to a full L with a pizza oven in the corner.
This guide gives the measurements that decide what fits, then eleven layouts built around the grill: straight runs, L-shapes, galleys, grill and pizza oven combinations, grill and smoker pairs, covered kitchens and compact stations for small patios. If you are still choosing materials and foundations, our outdoor kitchen plans guide covers the site, the base and the utility runs in more depth.
Outdoor Kitchen With Grill: The Measurements That Decide the Layout
Most outdoor kitchen layouts are drawn around four zones, the same way an indoor kitchen is: a hot zone (grill, side burner, pizza oven, smoker), a prep zone (bare counter), a wet zone (sink) and a cold zone (fridge or cooler). A small kitchen may have only the first two. Whatever the size, the grill sets the dimensions, so start with it.
| Piece | Typical width | What to plan around it |
|---|---|---|
| Built-in gas grill head | 30, 32, 36 or 42 in | The maker’s cutout size and, in a wood or combustible frame, its insulated jacket |
| Freestanding cart grill | 50 to 65 in with side shelves | A bay a few inches wider than the cart, open at the back for air |
| Flat-top griddle | 28 to 36 in cooking surface | Grease cup access at the front or side |
| Ceramic kamado | 18 to 24 in grill diameter | A non-combustible inset or a nest set into the counter |
| Pellet smoker | about 45 to 60 in long including the hopper | Room at the hopper end to load pellets |
| Countertop pizza oven | about 20 to 30 in wide | A deep non-combustible counter with a landing for the peel |
| Outdoor-rated fridge | 15 to 24 in | Away from the grill’s heat, ideally on another run |
Then the counters and clearances. These are rules of thumb used by kitchen designers, not code minimums; your grill’s manual and local rules come first:
- Landing space: at least 12 inches of bare counter on one side of the grill, and 18 to 24 inches on the other. Twenty-four inches holds a sheet pan and a cutting board side by side.
- Counter height: 36 inches for cooking and prep, 42 inches for a raised bar ledge where guests sit on bar stools.
- Counter depth: 24 to 30 inches for the cooking run. Many built-in grills need a cutout about 21 to 25 inches deep, so a 30 inch deep island leaves room for the gas connection behind the grill.
- Bar overhang: 10 to 12 inches beyond the island wall so knees fit under it.
- Behind the cook: 36 inches of clear patio at the least, 42 to 48 inches if two people work at once or a path crosses there.
- From the house: follow the grill maker’s clearance to combustible walls, eaves and railings. Many manuals ask for about 24 to 36 inches from the sides and back, and more under an overhang.
A quick way to read your space: a 36 inch grill with 12 inches on one side and 24 inches on the other already needs a 6 foot run. Add a sink and a little more prep and you are at 8 to 10 feet. If the patio cannot give a straight 8 feet, an L or a two-piece galley usually fits where a straight island will not.
11 Layouts for an Outdoor Kitchen With Grill
1. A Straight Grill Island on One Run
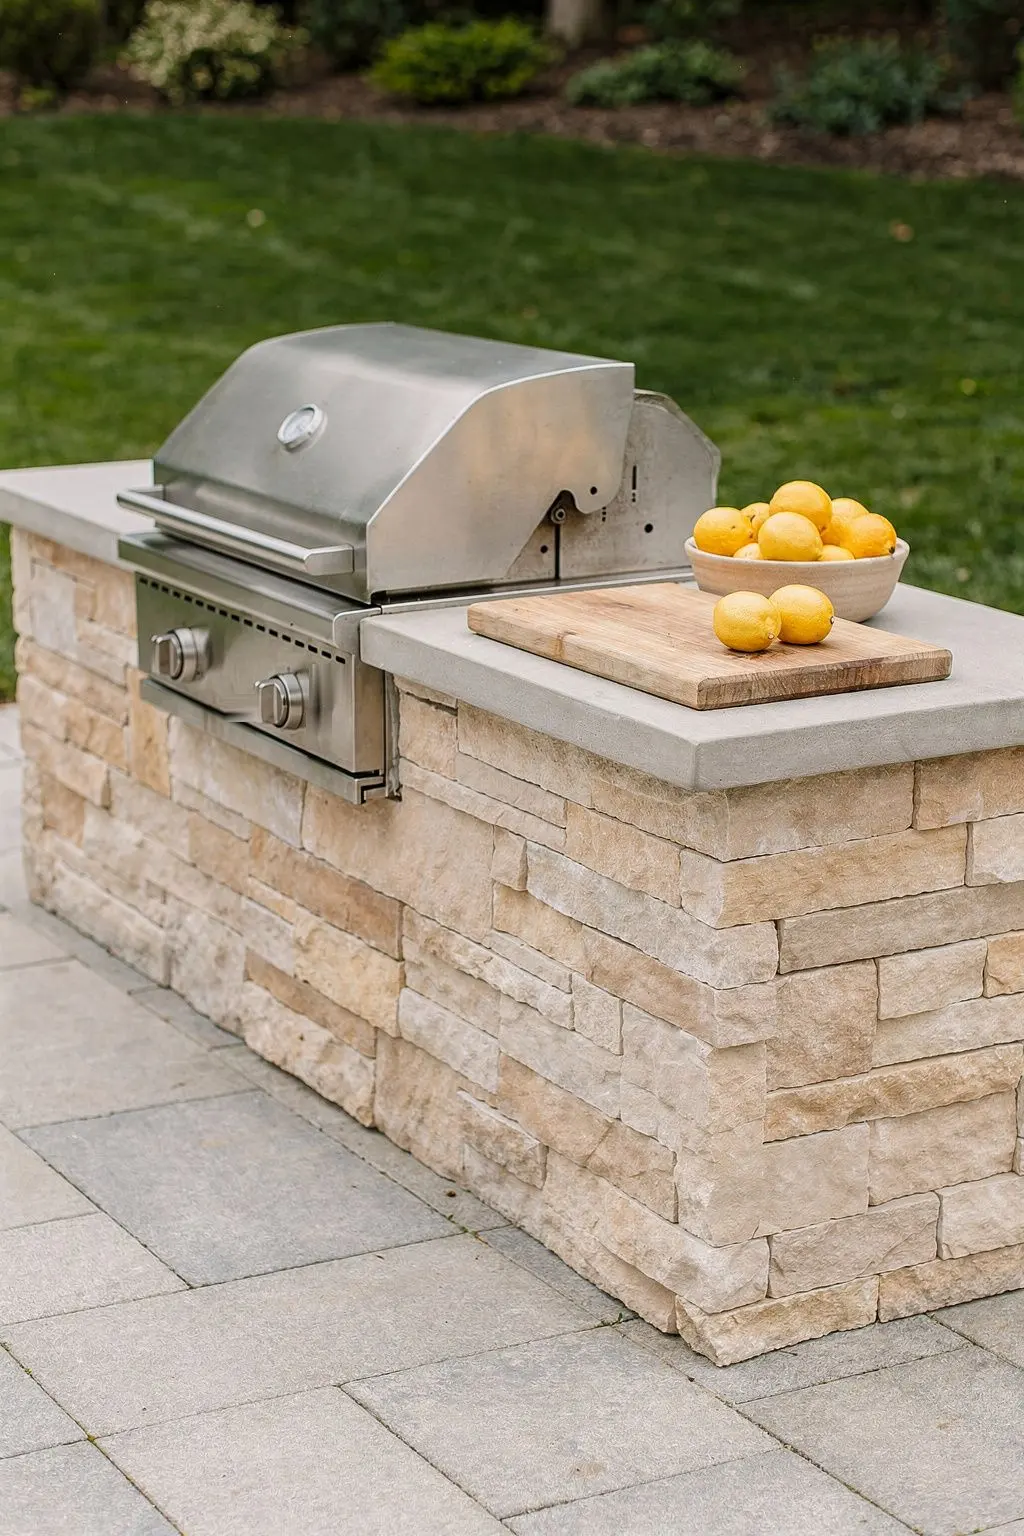
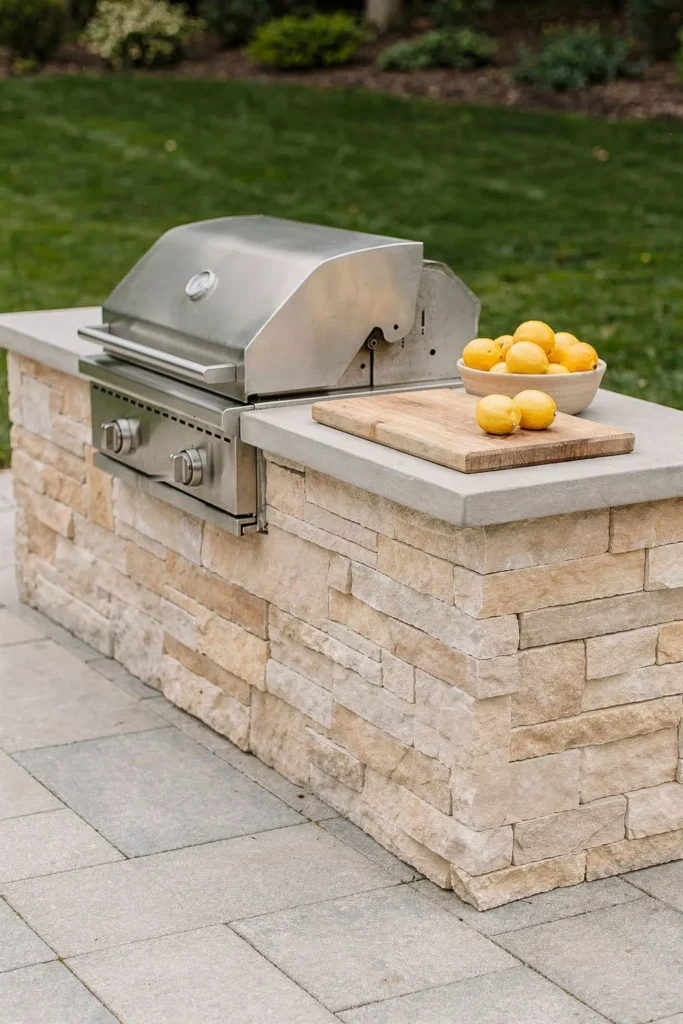
The simplest outdoor kitchen with grill is one straight island, 8 to 10 feet long and 30 inches deep, with the grill a little off-center. Put the shorter landing (12 to 18 inches) on the side toward the house and the longer prep run (24 to 36 inches) on the side where food arrives. Stone or stucco on the island walls and a sealed concrete, granite or porcelain top will shrug off heat, rain and grease.
Stand the island parallel to the house, not facing it, so the cook looks out over the yard and the smoke drifts away from the back door. Keep the grill at least the manual’s distance from the siding; on most patios that means pulling the island 3 to 4 feet out from the wall.
2. An L-Shape With the Grill on the Long Leg
An L gives the most counter for the patio it uses. Put the grill on the long leg, 8 to 10 feet, and turn the short leg (5 to 6 feet) into prep space and a serving counter. The corner between them is hard to reach, so keep it as plain counter for the platter of raw food rather than putting an appliance there.
This is the layout most people mean when they search for outdoor kitchen designs plans with grill and a bar: raise the outside edge of the short leg to 42 inches and guests can sit on bar stools facing the cook without standing in the way.
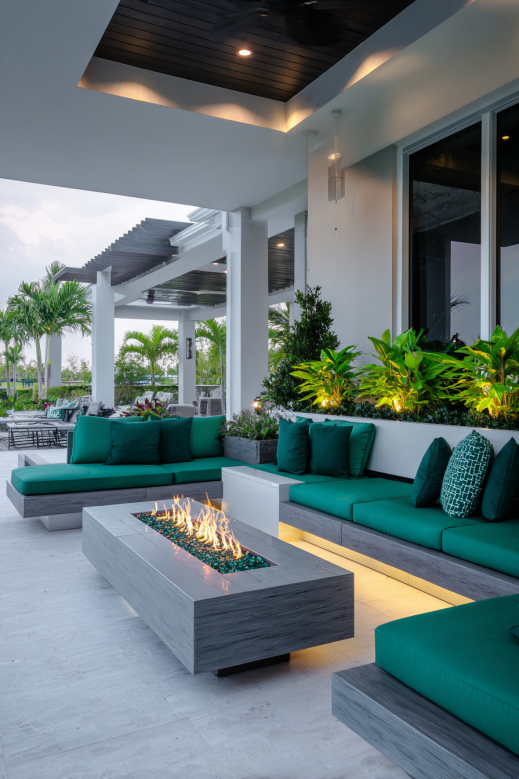
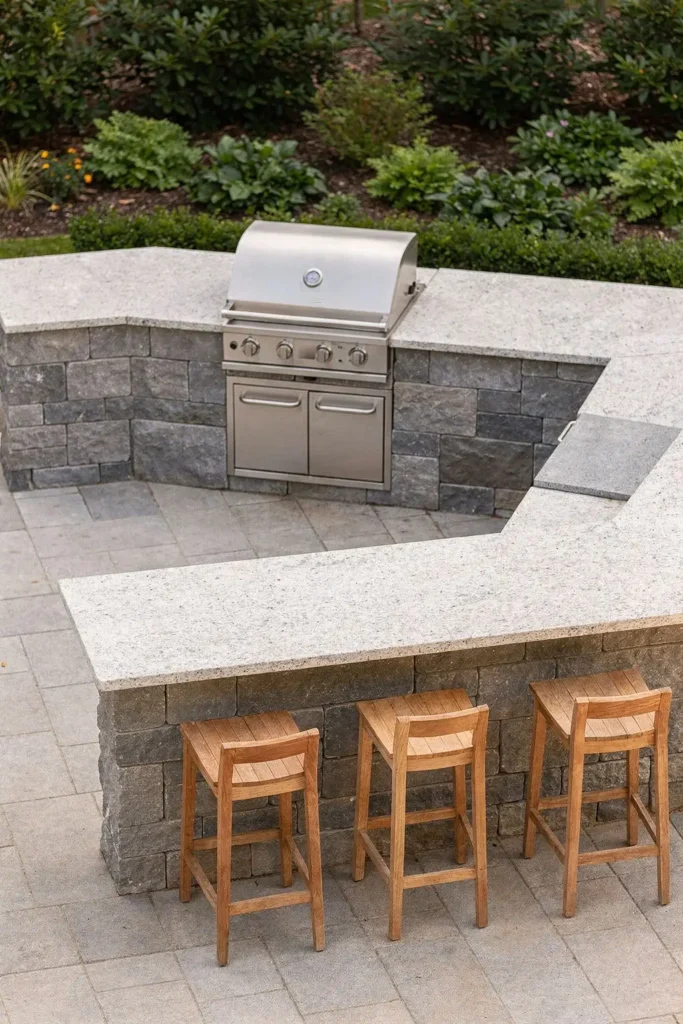
Where the patio is deep enough, a third run turns the L into a U, as pictured: the grill on the back run, prep on the side run, and the bar counter across the front, facing the cook. Keep the open end of the U at least 42 inches wide so the cook can walk in and out carrying a full tray.
3. A Galley: Grill on One Side, Sink and Prep Opposite
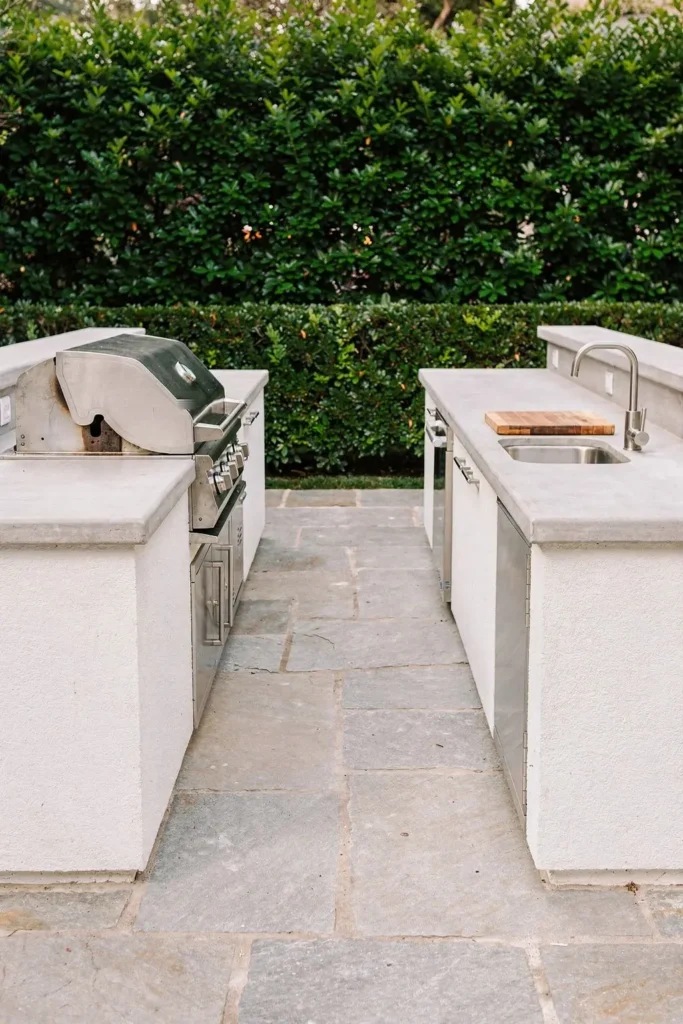
Two parallel counters with a 42 to 48 inch aisle between them work well on a long, narrow patio or along a deck. The grill run takes the hot zone, and the opposite counter takes the sink, the fridge and the prep surface. The cook turns around instead of walking, which is the fastest working layout there is.
Keep the hot side on the downwind side of your usual breeze, and do not narrow the aisle below 42 inches: an open grill lid and a person standing behind it need that much room. If both counters must be the same height, make them 36 inches and add the bar seating at one end instead.
4. Grill Plus a Pizza Oven in the Corner
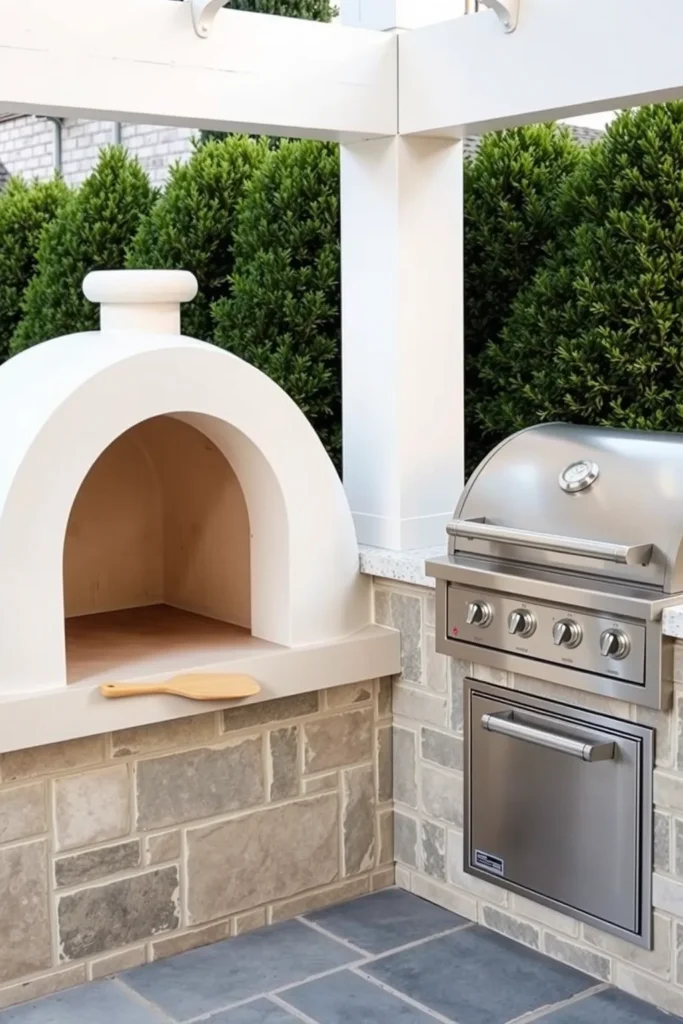
A wood-fired or gas pizza oven is one of the most requested additions, and the corner of an L is its natural home: the oven’s round dome fills the awkward corner that a grill cannot use, and its front faces the cook at a 45 degree angle. Leave at least 18 to 24 inches of non-combustible counter in front of or beside the oven mouth for the peel and the finished pizza.
Keep a stretch of plain counter between the oven and the grill rather than butting them together. Both throw heat, and the cook needs a cooler spot to stand while working the oven. If you are building a dome oven from scratch, our DIY outdoor kitchen plans include a wood-fired oven build.
5. A Grill and Smoker Side by Side
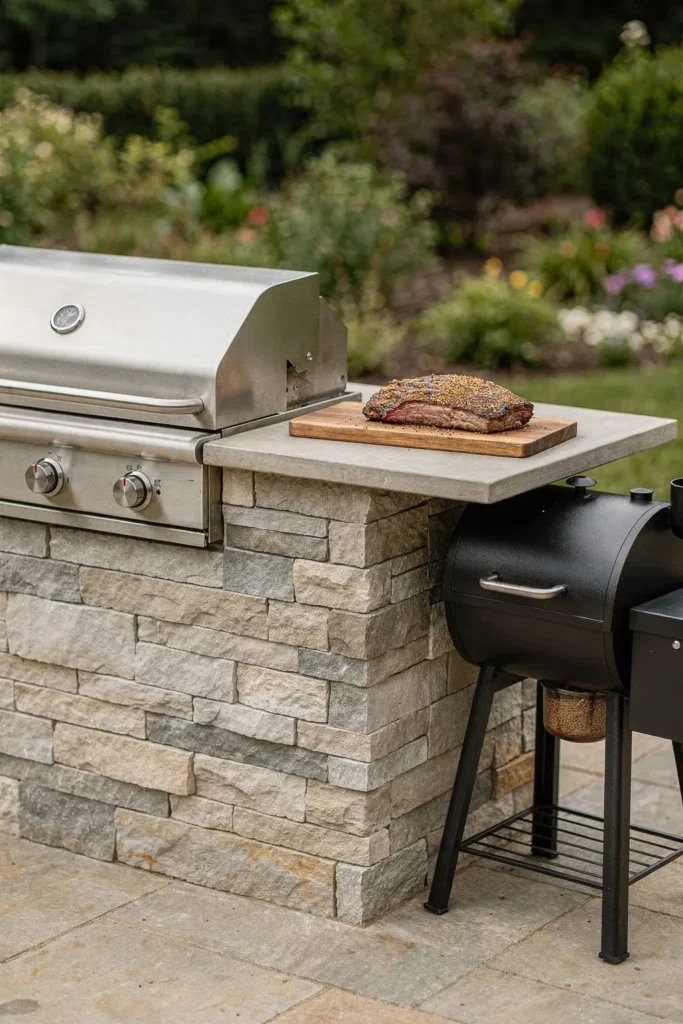
People who smoke as well as grill want both within one step. A pellet smoker is long (about 45 to 60 inches with its hopper), so give it its own end of the run, or its own short counter, with the hopper end facing open patio so pellets can be loaded without moving it. Leave at least 24 inches of counter between the grill and the smoker: it is where the rubbed brisket waits and where the cook rests a probe thermometer.
A smoker is rarely built in. A freestanding one parked in a bay at the end of the island, on a non-combustible pad, keeps the build simple and lets the smoker move for cleaning.
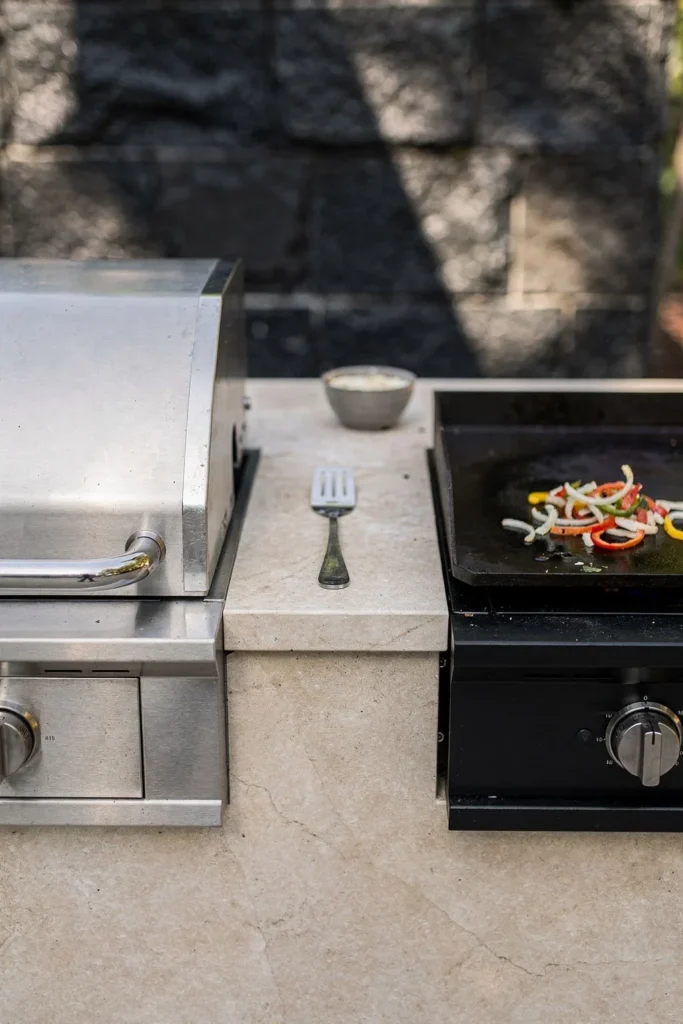
6. Grill and Flat-Top Griddle Together
A flat-top griddle handles everything the grates cannot: eggs, smash burgers, fried rice, onions and peppers. Set it directly beside the grill, with 12 to 18 inches of counter between, so one cook can run both and slide food from one to the other. A 36 inch griddle beside a 36 inch grill on a 10 foot island still leaves about 2 feet of prep on the far end.
Put the griddle on the side nearer the prep counter. Griddle cooking involves more chopped ingredients and more sauces than grilling does, and that keeps the bowls close.
7. A Grill Island With a Raised Bar Ledge
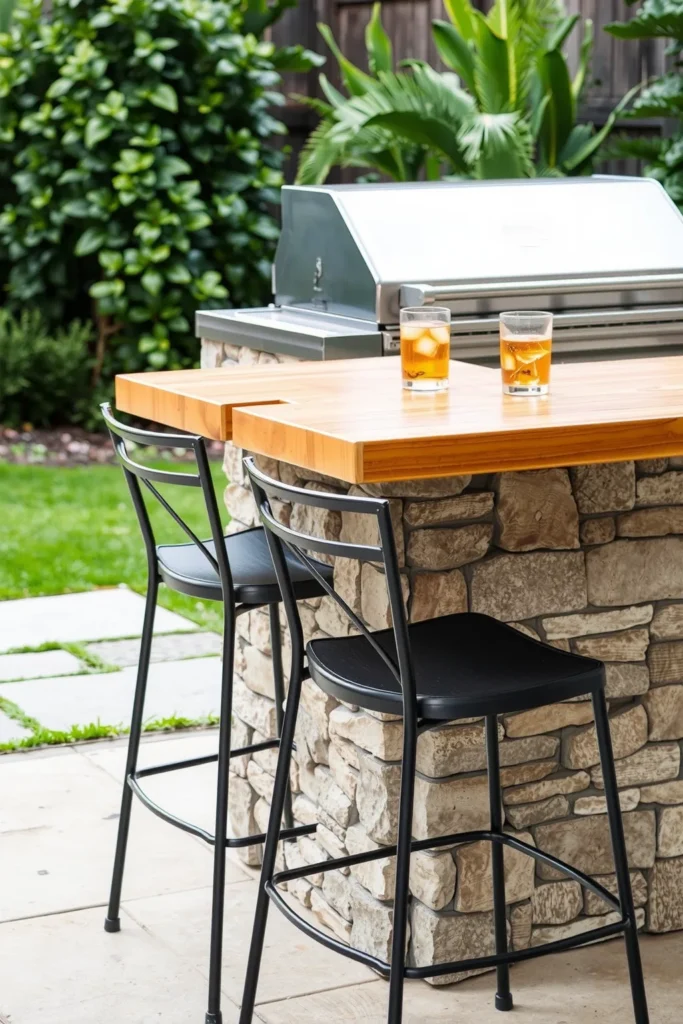
Guests always gather where the cook is. A raised bar ledge along the back of the grill island, 42 inches high and 12 inches deep, gives them a place to lean and set a drink without reaching over the hot zone. The 6 inch step between the 36 inch cooking surface and the 42 inch ledge also stops a curious hand from drifting onto the grill.
Allow about 24 inches of ledge per bar stool, and 36 inches of open patio behind the stools so people can pull them out. A 9 foot island seats four.
8. A Covered Grill Station With a Vent Hood
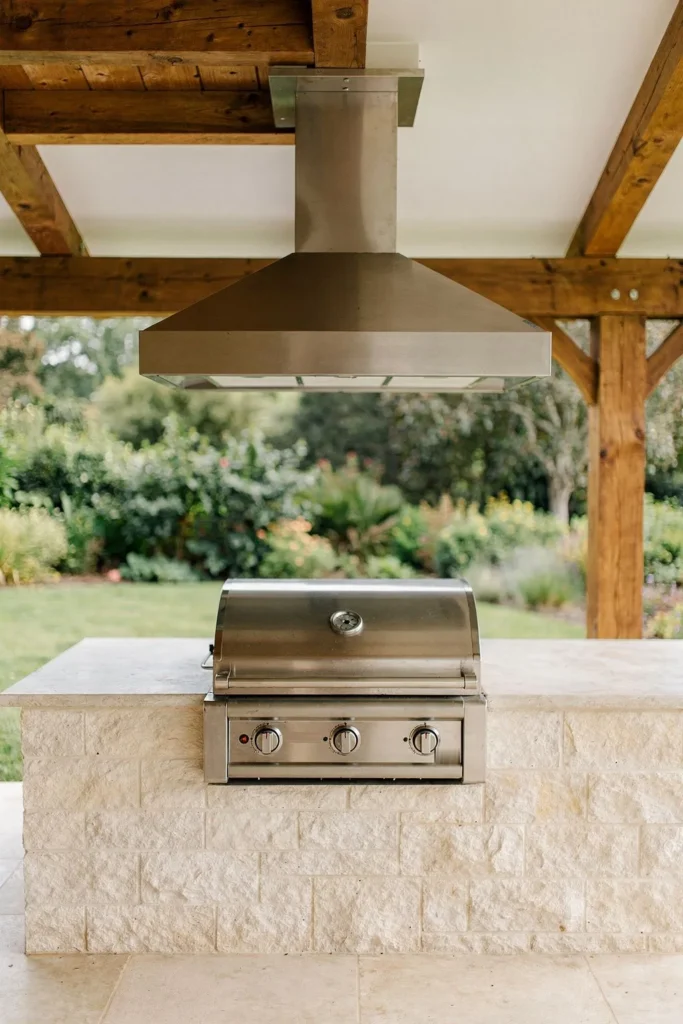
A roof over the kitchen lets you cook in the rain and keeps the sun off the counters, but it traps smoke and heat. Under a solid roof, a grill needs an outdoor-rated vent hood that is at least as wide as the grill, with about 3 inches extra on each side being the usual rule, and the ceiling above it should be non-combustible or protected as the hood maker specifies. Many grill manuals also give a minimum height from the cooking surface to an overhead structure; it is often 4 to 5 feet or more.
An open pergola is more forgiving than a solid roof because smoke escapes between the rafters, but keep the grill out from under the beams anyway. Our guide to covered patio ideas compares pergolas, solid roofs and louvered roofs for this.
9. A Deck Kitchen on a Non-Combustible Pad
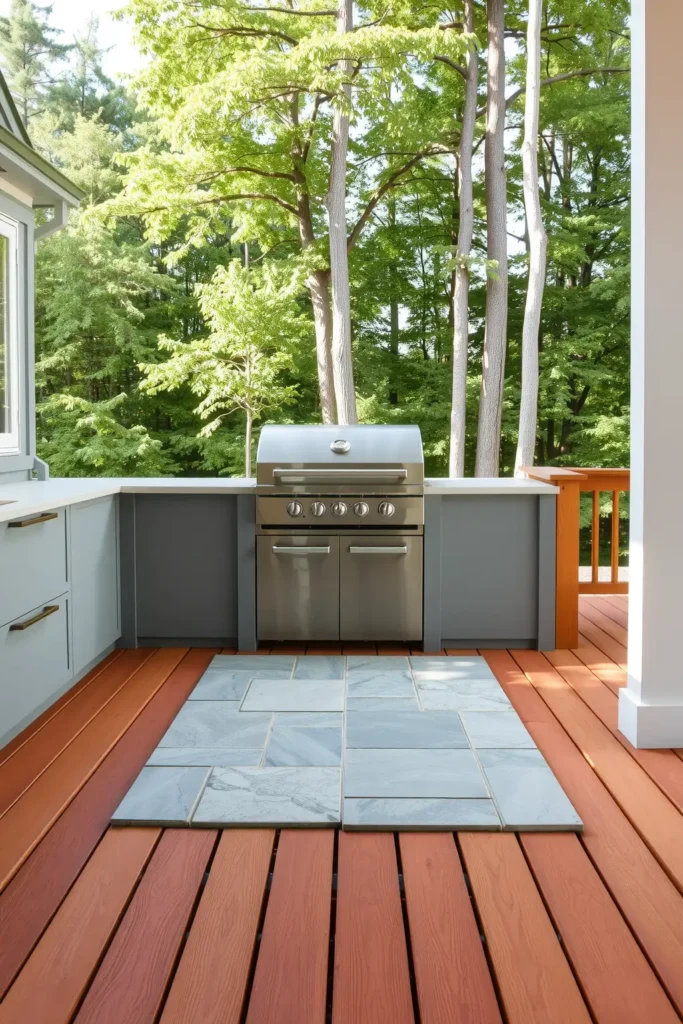
A deck can carry an outdoor kitchen, but it needs two extra steps. First, weight: a stone-clad island with a granite top can weigh well over 1,000 pounds, so check that the deck framing can carry it, or build the island from a light steel frame with cement board and a thin porcelain top. Second, heat and grease: set the grill on a non-combustible pad that extends past its footprint, and keep it clear of railings and siding by the distance its manual gives.
On a deck, a straight run along the outer edge usually works better than an L that blocks the stairs. Leave a 36 inch path from the house door to the deck steps that never passes behind the grill.
10. A Roll-In Bay for the Grill You Already Own
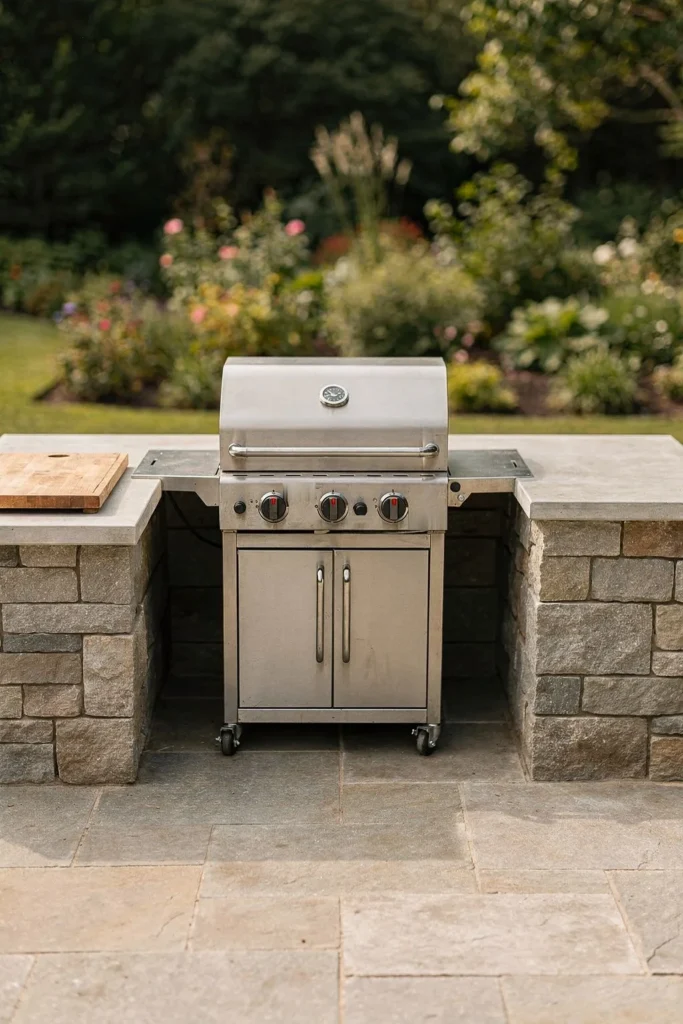
An outdoor kitchen with grill does not have to start with a new grill. Many people already have a good freestanding grill and do not want to replace it with a built-in head. Build the counters around it instead: two short islands, or one island with an open bay, sized a few inches wider and taller than the cart so it rolls in and out. Leave the back of the bay open for air, and keep the gas tank outside the cabinet unless the bay is vented as the grill maker requires.
The bay keeps the cart grill movable for cleaning and replacement, and the counters on each side give it the landing space a cart’s fold-down shelves never quite do. Measure the cart with its side shelves folded down, then add about 2 inches each side.
11. A Compact Grill Station for a Small Patio
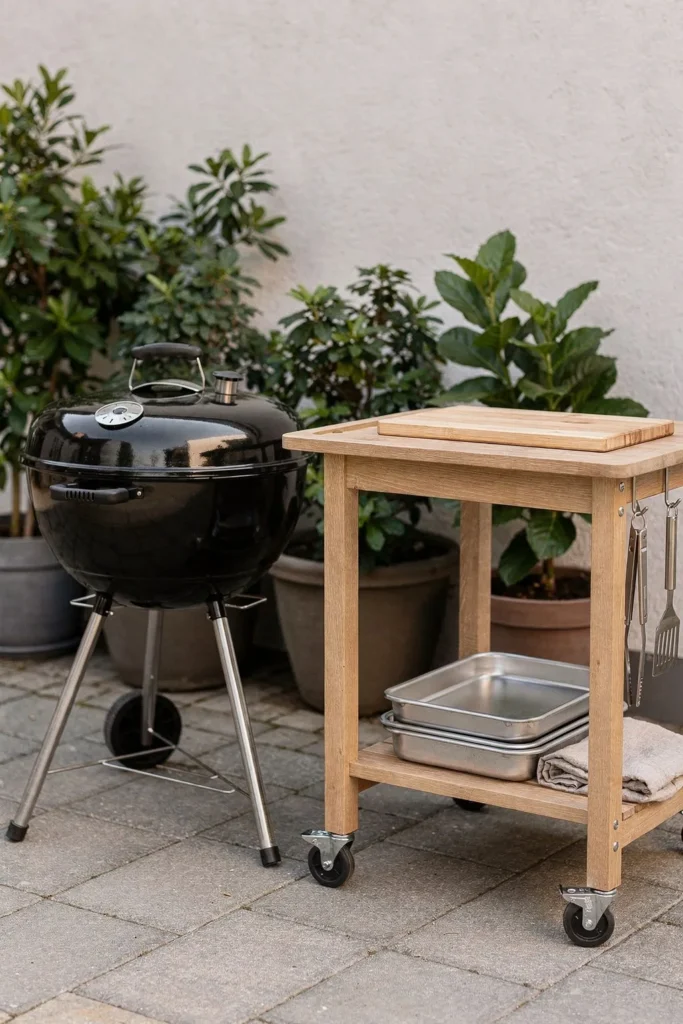
Not every yard needs a kitchen. A small patio can work with a cart grill and one rolling prep cart beside it: 30 to 36 inches of stainless or wood-topped surface, a shelf underneath for tongs, trays and seasoning, and locking wheels. Together they take about 7 feet of patio and give the cook the same landing space as a built-in island.
Hang tools on the side of the cart rather than on the grill, which gets hot, and keep a lidded bin for charcoal or a covered spot for the propane tank on the far side of the cart.
How to Choose the Right Layout for Your Patio
Pick the layout for your outdoor kitchen with grill by the space you have and the way you cook, not by the photo you like most.
- Under 8 feet of usable run: a compact station (11) or a roll-in bay with one short counter (10).
- 8 to 10 feet along one side: a straight island (1), with a bar ledge (7) if guests sit with the cook.
- A square patio corner: an L (2), with a pizza oven in the corner (4) if you want one.
- A long, narrow space or a deck edge: a galley (3) or a straight run on a light frame (9).
- You smoke or griddle often: plan a second hot appliance from the start (5, 6), even if it arrives later; it is far easier to leave a bay than to cut one.
- Rain or hard sun most of the year: a covered station (8), budgeted with its vent hood.
Before you build, mark the full outline on the patio with chalk or tape, set a chair where the grill goes, and walk through a cook: carry a tray from the back door, set it down, turn to the grill, plate up and walk to the table. If you bump into anything, change the drawing, not the habit. For the utility side, gas, water and electric runs, see our guide on where DIY outdoor kitchens go wrong, and for planning the whole yard around the kitchen, our outdoor kitchen designs plans guide.
Grill Safety Basics for an Outdoor Kitchen With Grill
- Follow the grill maker’s installation manual for clearances, insulated jackets and ventilation; it overrides every rule of thumb here.
- Vent any enclosed cabinet that holds a gas line or a propane tank, top and bottom, as the grill maker specifies.
- Have gas connections made or checked by a qualified installer, and use outdoor-rated, GFCI-protected outlets near the sink and fridge.
- Keep a fire extinguisher rated for grease fires within reach, but not on the grill island itself.
- Plan good task light over the grill for evening cooking. Our pick of string light sets for patios covers the surrounding area, and a clamp-on grill light covers the cooking surface.
Frequently Asked Questions
How much counter space do you need next to a grill?
At least 12 inches on one side and 18 to 24 inches on the other. Twenty-four inches holds a sheet pan and a cutting board. With a 36 inch grill, that adds up to about a 6 foot run before any sink or extra prep space.
What is the best layout for an outdoor kitchen with grill?
For most patios, an L-shape with the grill on the long leg and prep and seating on the short leg. It gives the most counter for the space and keeps guests out of the cook’s path. A straight island is the simplest and cheapest option if you have 8 to 10 feet along one side.
How far should an outdoor grill be from the house?
Follow the grill’s installation manual. Many ask for about 24 to 36 inches from combustible walls and railings, and more under an overhang or eave. Some local fire rules set larger distances on decks and balconies, so check them too.
Can you put a pizza oven next to a grill?
Yes, and the corner of an L-shaped kitchen is the usual spot. Leave a stretch of non-combustible counter between them so the cook has a cooler place to stand, and 18 to 24 inches of landing space in front of or beside the oven mouth for the peel.
How tall should an outdoor kitchen counter be?
Thirty-six inches for the cooking and prep surface, the same as an indoor kitchen. A raised bar ledge for seated guests is usually 42 inches high and 10 to 12 inches deep.
Can I build an outdoor kitchen around an existing grill?
Yes. Build an open bay a few inches wider and taller than the cart grill with its shelves folded, leave the back open for airflow, and add counters on each side for landing space. The grill can still roll out for cleaning.