A professional-built outdoor kitchen from a contractor typically runs $15,000 to $50,000, and most of that quote is labor, project management, and custom fabrication rather than the grill, the counter, and the block work you actually end up with. Building your own gets you the same result for a fraction of the price, if you’re willing to put in the weekends.
The 15 plans below range from a simple portable cart you can build in a day to a full stone-clad island with a built-in pizza oven that takes a season to finish. Each one includes the details that actually matter: material choices, rough costs, clearances, and what to watch out for.
1. Build the Kitchen Into an Existing Deck
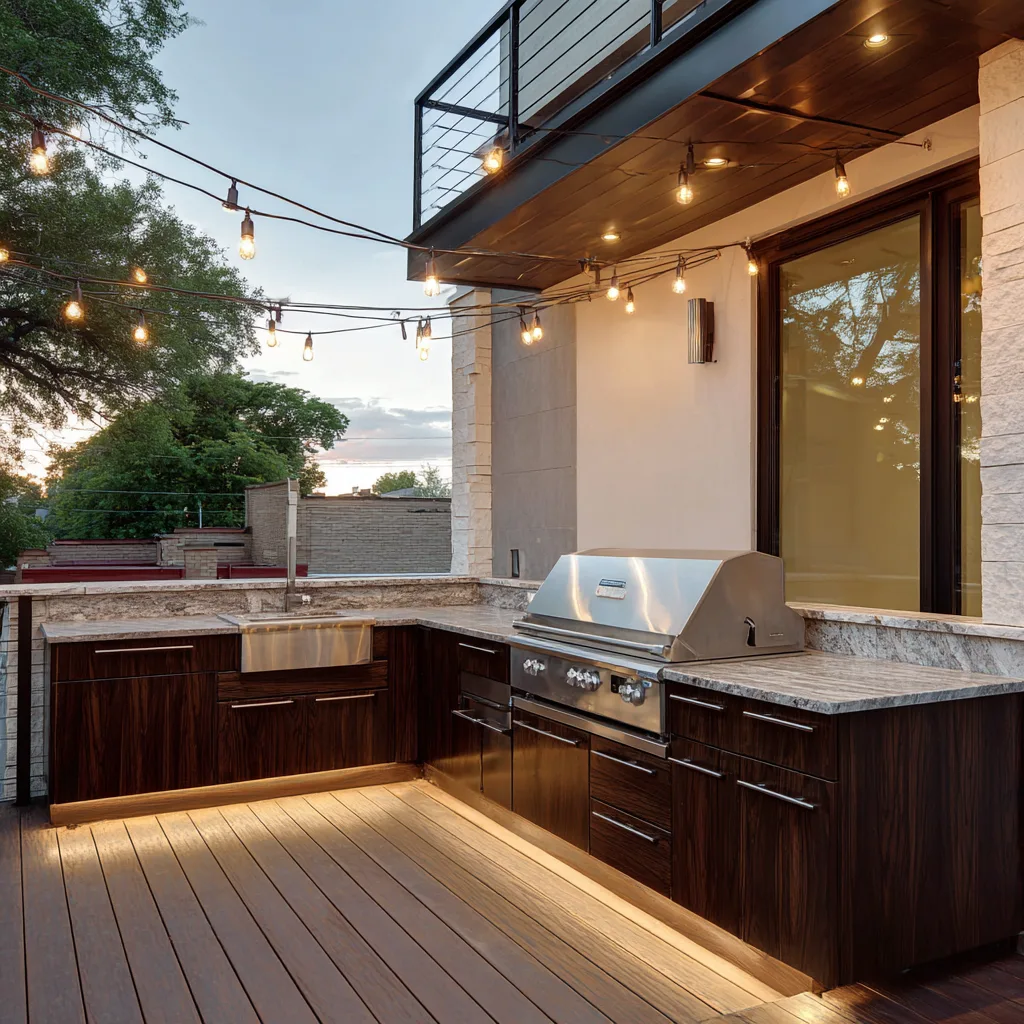
Integrating a kitchen into an existing deck skips the foundation work a ground-level build requires, since you’re building on a surface that’s already there. The tradeoff: confirm your deck’s framing can carry the extra load first. Appliances, stone or tile cladding, and stored dishware add up fast, and most residential deck framing isn’t sized for that dead load without reinforcement. Sistering additional joists under the kitchen footprint before you build is the standard fix.
Use exterior-rated cabinetry, stainless steel hardware, and composite decking rather than dimensional lumber for anything sitting in standing water or direct sun. Leave at least 48 inches of clear space behind the grill for safe movement and ventilation — tighter than that and you’ll be bumping into the railing every time you flip something.
2. Clad a Grill Island in Stone
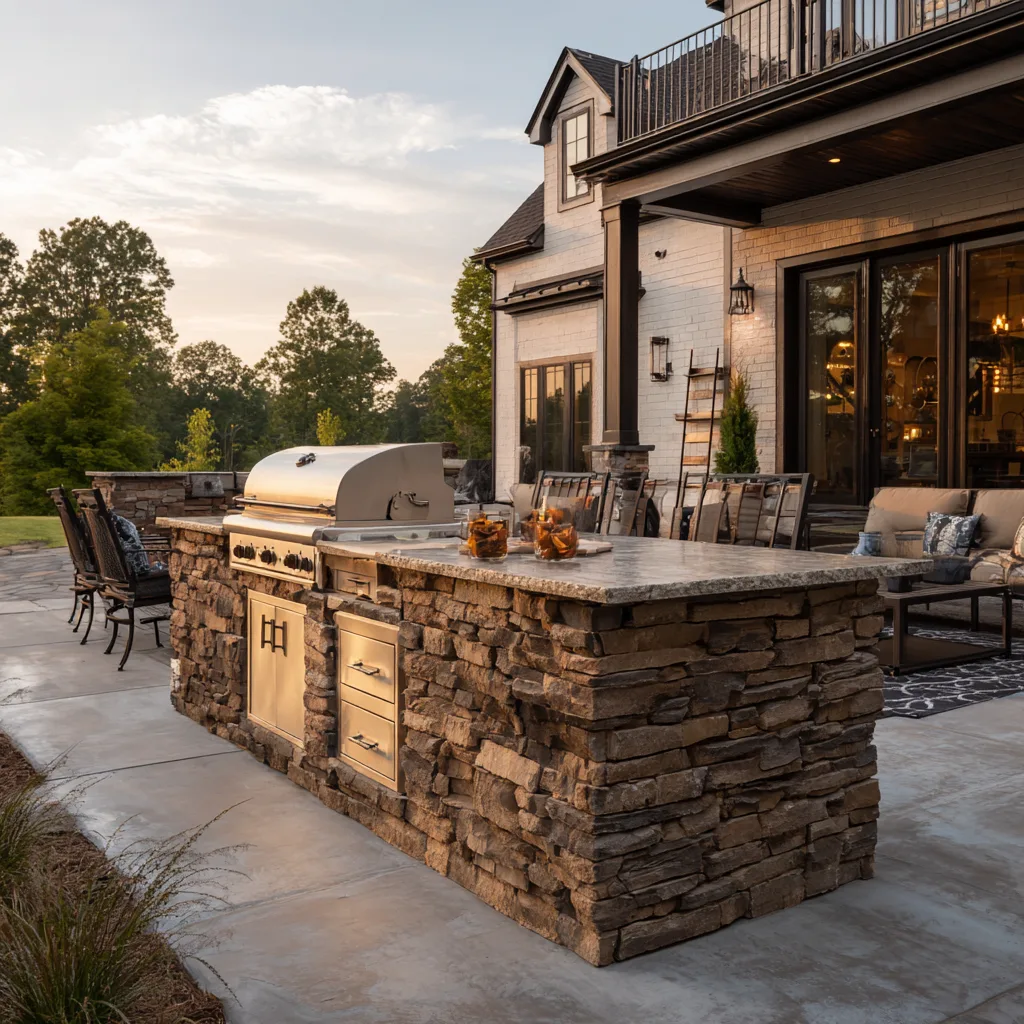
A stone-clad island reads as a permanent structure rather than a weekend project, which is the point — it works best on larger patios where you want a visual anchor. The core is typically concrete block (CMU) for structural stability, with a stone veneer applied over it using a weather-rated mortar or adhesive system rather than solid stone, which is prohibitively heavy and expensive for most builds.
Cultured stone veneer costs less and weighs a fraction of natural fieldstone or stacked stone, which matters both for your budget and for what your foundation needs to support — confirm your slab or footing is rated for the added weight before committing to natural stone. Plan for proper drainage at the base so water doesn’t pool against the block core, and budget two to three weekends if you have help for the block-laying and veneer phases.
3. Add a Bar Under a Pergola
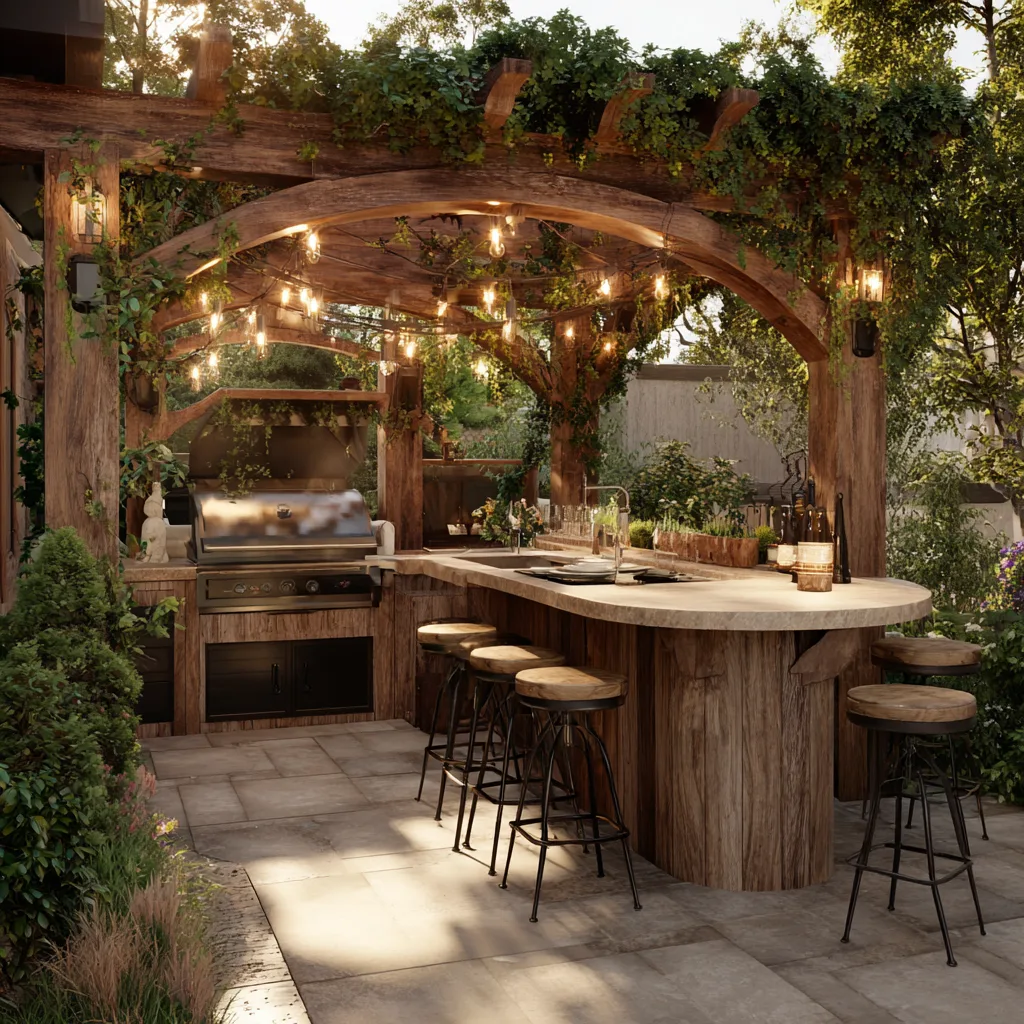
A pergola over the cooking and bar area does two things a bare island can’t: it provides shade during the hottest part of the day, and it visually defines the space as its own outdoor room rather than an appliance sitting on open patio. Cedar and pressure-treated lumber are the standard framing choices; vinyl costs more upfront but needs no repainting or resealing.
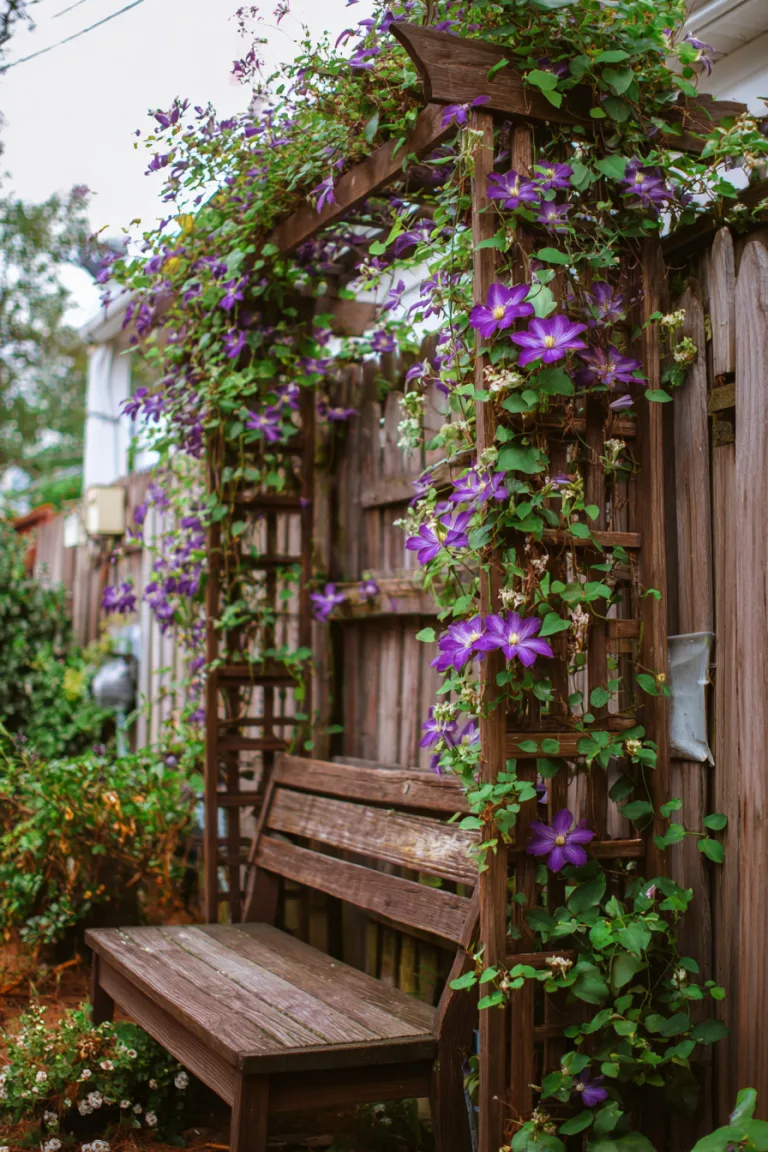
Build the bar counter to standard bar height — 42 inches, about six inches taller than a typical 36-inch kitchen counter — so stools sit correctly underneath it. An L-shaped or curved island beneath the pergola keeps the cook facing guests instead of a wall. Climbing vines like grapevine trained across the pergola slats add shade as they fill in, though expect a year or more before they provide real coverage.
4. Choose Concrete Countertops for Custom Color
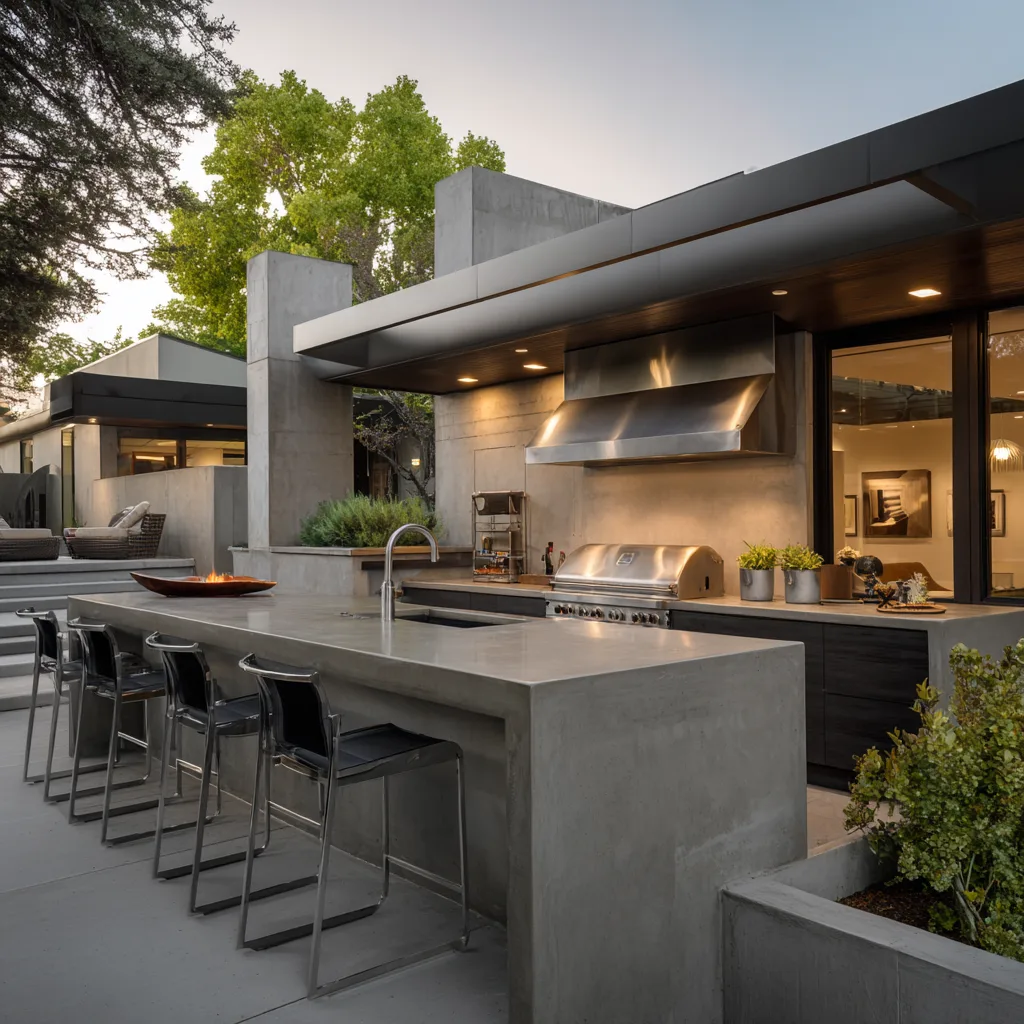
Poured concrete costs meaningfully less than natural stone and lets you set the exact size, shape, and color rather than working around slab dimensions — useful for an L-shaped or curved island where a stone fabricator would charge a premium for a custom cut. Integral color mixed into the batch gives consistent color throughout; acid stain applied after curing gives a mottled, variegated look instead.
Concrete needs roughly 28 days to reach full cured strength, though it’s typically safe to handle and use well before that. Use a fiber-reinforced countertop mix rather than standard structural concrete — the fibers resist the hairline cracking a thin slab is prone to — and reseal annually, since concrete is porous and will stain from grease and wine without a sealer. A warm gray or charcoal integral color hides minor staining and water spots far better than plain white.
5. Fit a Full Kitchenette Into an L-Shape
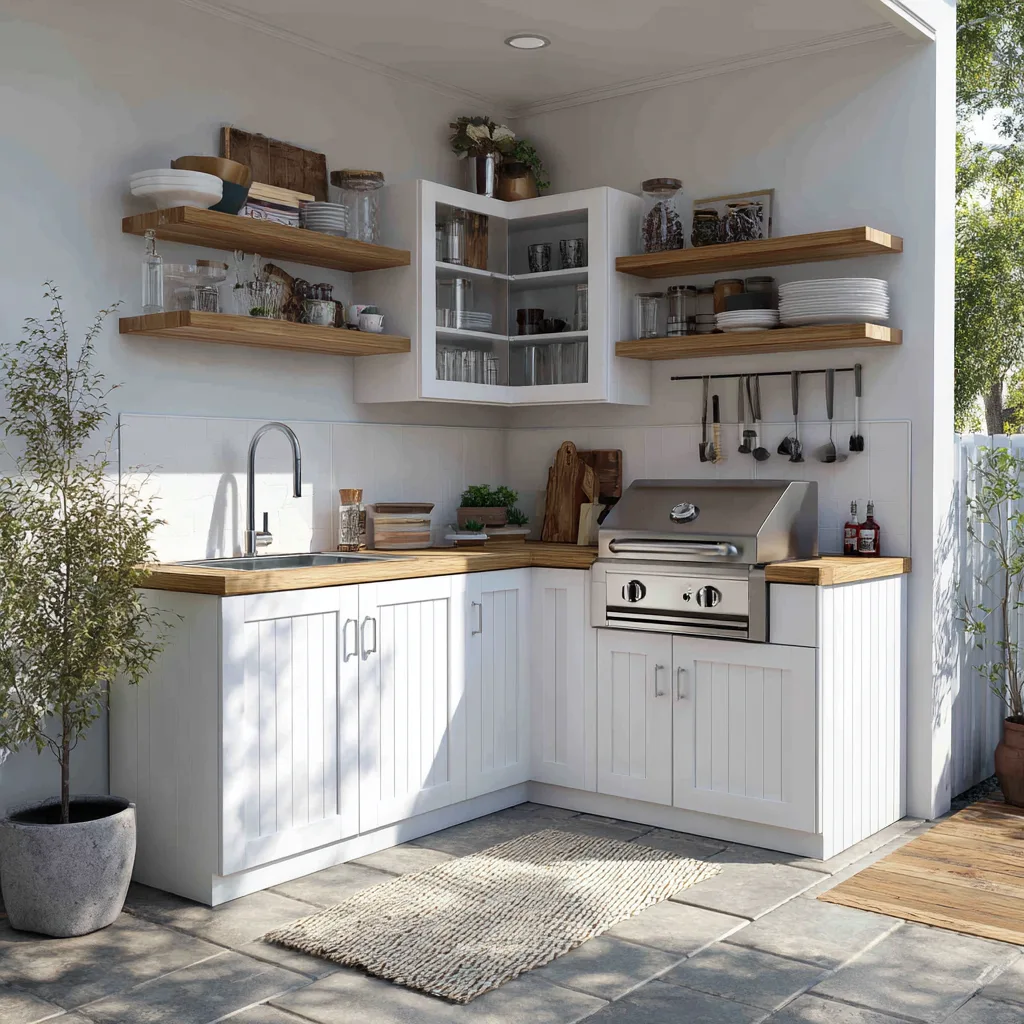
When space is limited, an L-shaped kitchenette layout fits a grill, a side burner, a small refrigerator, and a sink into a footprint most patios can accommodate, using upper and lower cabinets built the way you’d build indoor cabinets — just with exterior-grade materials substituted throughout. Marine-grade plywood, stainless steel hinges and hardware, and a weather-resistant finish are non-negotiable; standard interior cabinet materials will delaminate outdoors within a season or two regardless of paint.
Run plumbing and electrical rough-ins before building the cabinet boxes around them — retrofitting a sink or outlet into a finished cabinet run is far harder than planning for it up front. Light, easy-to-clean colors like sage green, warm gray, or white show less dirt and pollen buildup than darker finishes on a surface that lives outdoors year-round.
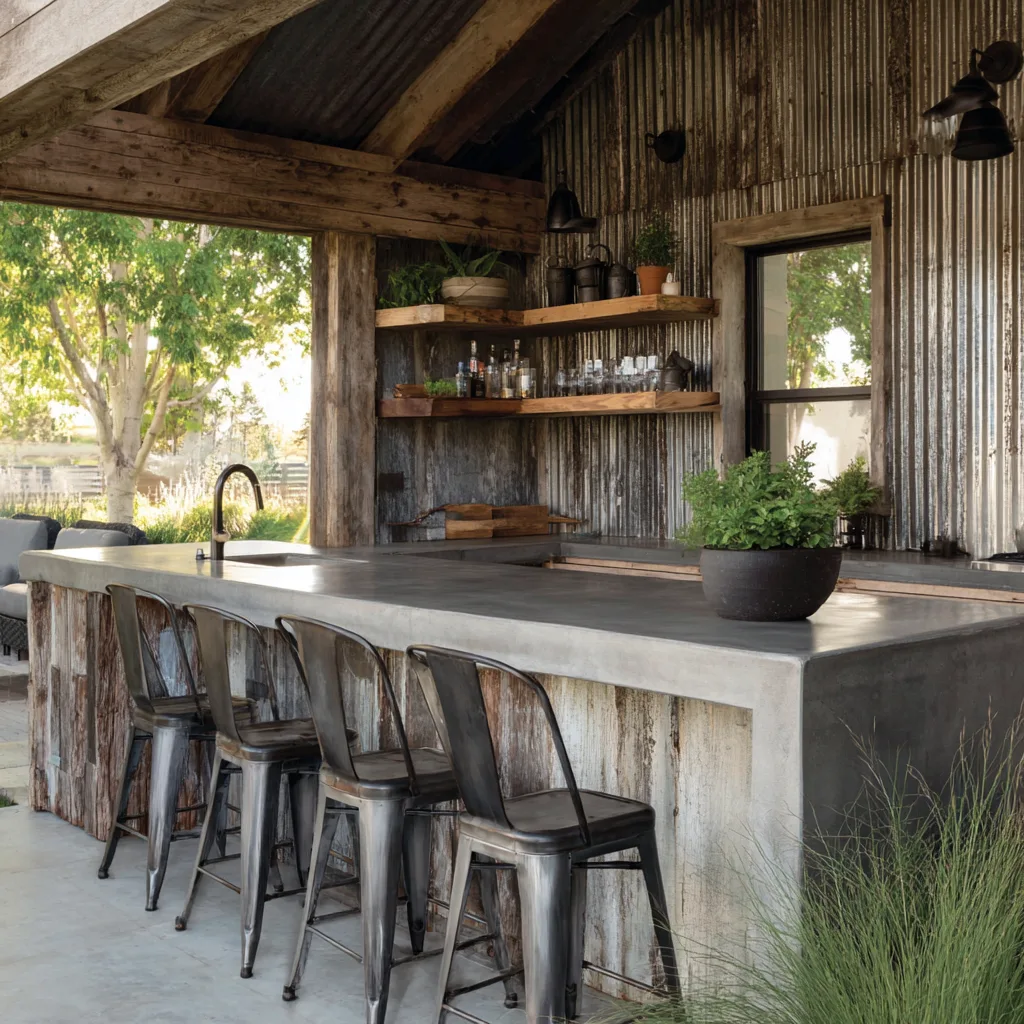
6. Combine Concrete and Corrugated Steel
Corrugated steel panels and reclaimed barn wood bring an industrial-farmhouse look at a real cost advantage if you can source materials secondhand — salvaged steel roofing and fence lumber can bring a build in well under $500 in materials, though sourcing takes patience. The steel provides genuine weather protection as cladding, while poured or precast concrete handles the work surfaces.
Bare steel develops a natural rust patina over time, which is the intended look for this style; a clear rust-inhibiting sealer slows that process if you’d rather it stay uniform. The detail that actually matters here is sealing every joint where steel meets concrete or wood — dissimilar materials expand and contract at different rates, and an unsealed seam is where water gets in and causes rot or rust-through over a few seasons.
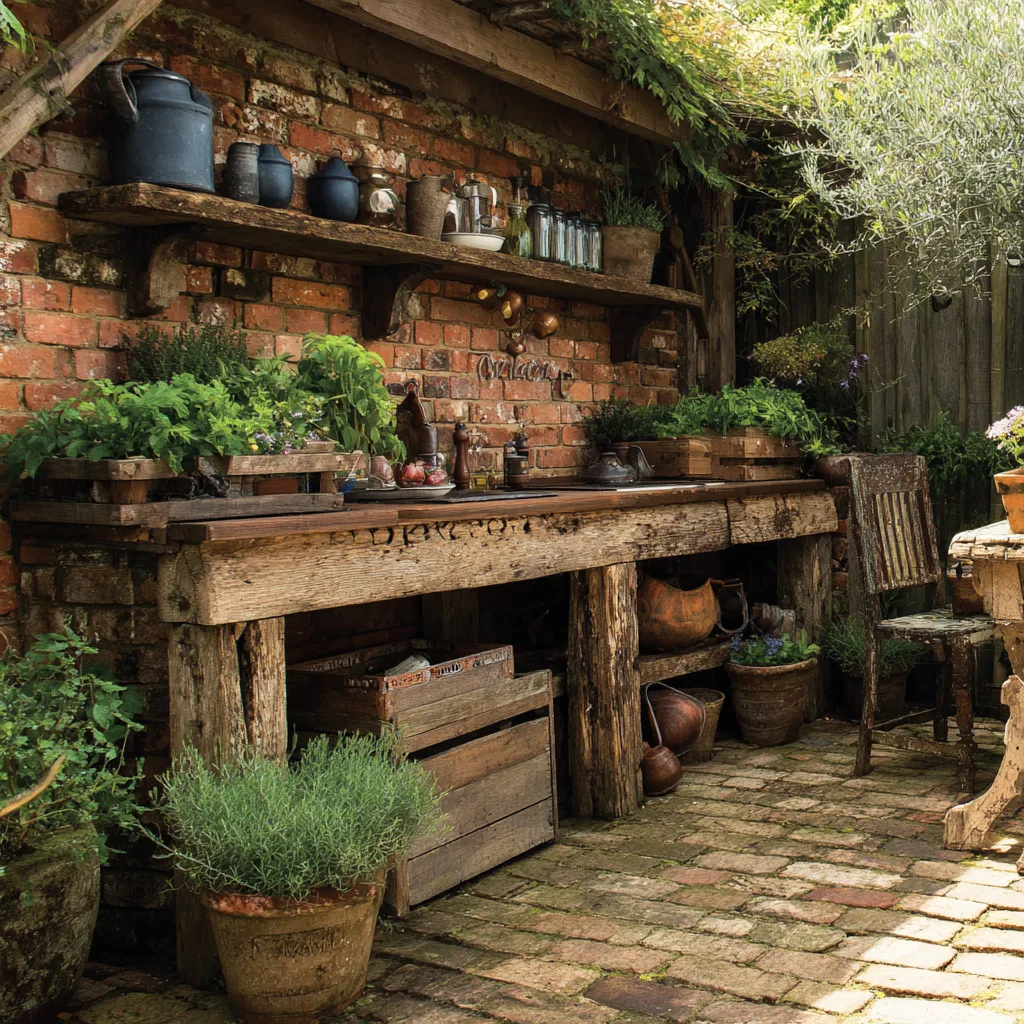
7. Build With Reclaimed Wood and Brick
Reclaimed fence posts, salvaged brick, and old pavers give a build a weathered, settled-in look new materials can’t fake — the imperfections, like variation in brick color or checking in old wood posts, are the actual visual interest, not a flaw to hide. This approach typically surrounds an existing freestanding grill with custom storage and counter space built from the salvaged material.
Reclaimed wood still needs the same outdoor-rated stain or sealer as new lumber; “reclaimed” describes its history, not its weather resistance, and untreated old wood rots just as fast as untreated new wood. Reseal annually. Because the materials are irregular in size, this project rewards basic carpentry skill more than precise measurements — a single weekend is realistic if you’re comfortable improvising around material that isn’t uniform.
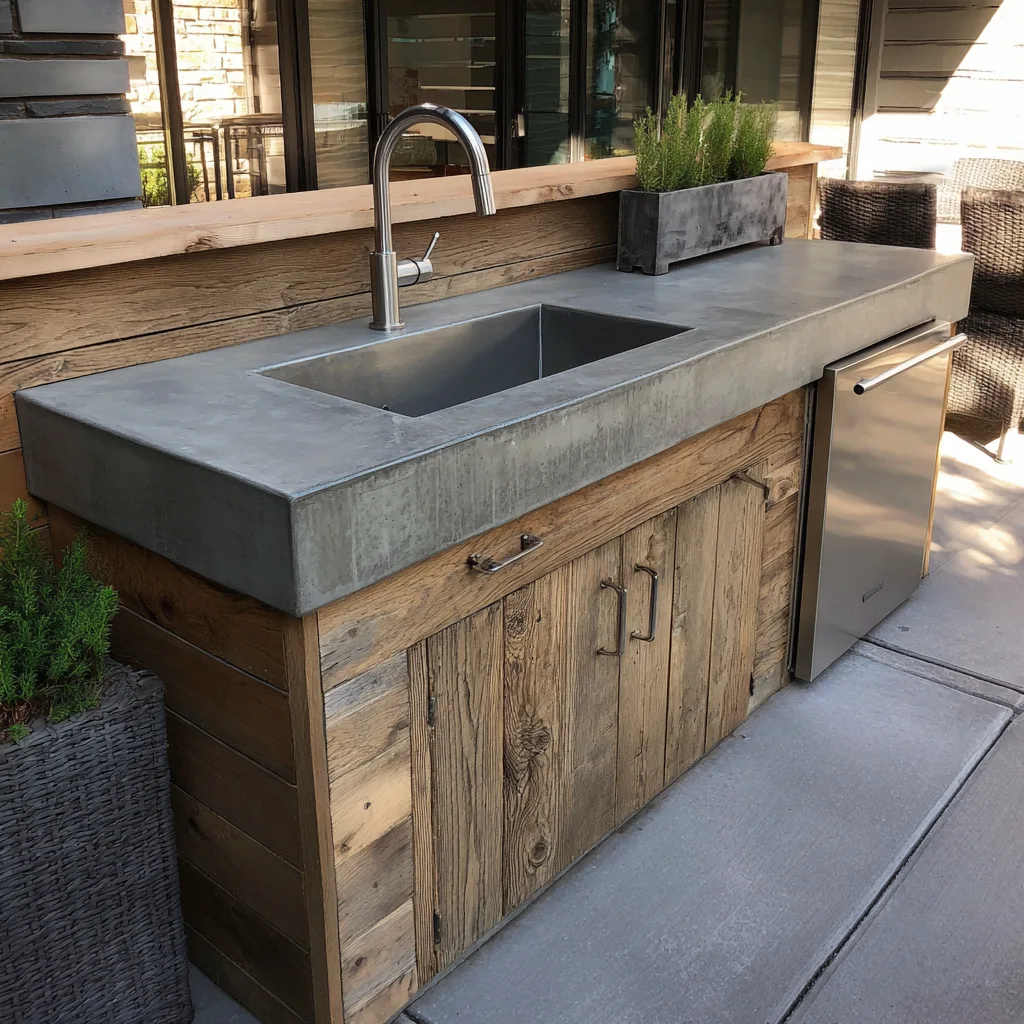
8. Pour Your Own Concrete Countertop Forms
Where the concrete countertop above is about color and curing, this one is about the actual pour. Build a form from melamine-coated particleboard or plywood, which releases cleanly from cured concrete better than raw wood does, and coat it with a concrete release agent before pouring so the finished slab doesn’t tear the surface pulling free.
Use a fiber-reinforced countertop mix rather than a standard bag mix — the fibers resist the hairline cracks a 1.5 to 2-inch thick slab is prone to at that thickness. Vibrate the poured concrete (a hand-held concrete vibrator, or repeated tapping on the form sides) to work out air bubbles, which otherwise show up as pockmarks on the finished face. Cover the form with plastic sheeting for the first several days to slow moisture loss — concrete that dries too fast cures weaker and is more prone to surface cracking. Demold after about a week, then grind and seal the face.
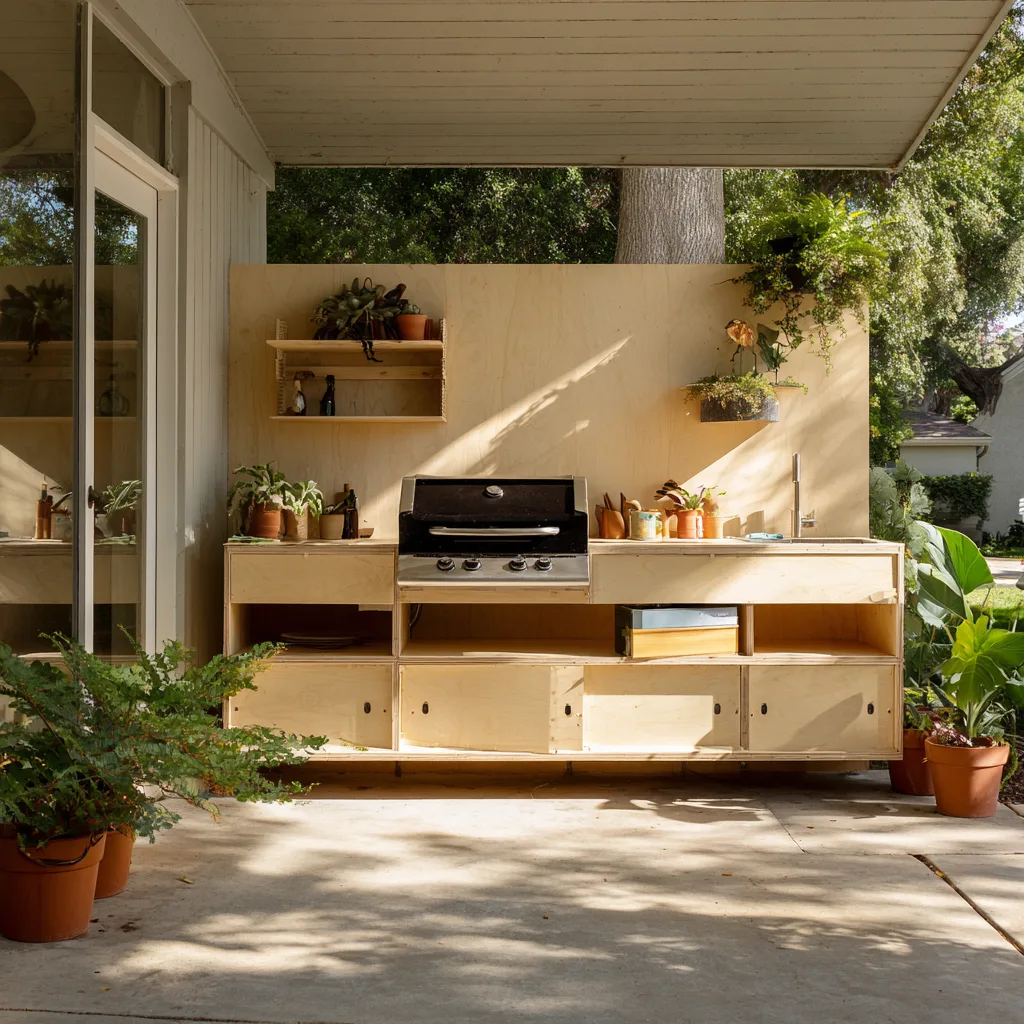
9. Follow a Modular Plywood-Frame Build
A step-by-step plywood-frame kitchen removes most of the guesswork of a custom design — the frame is essentially a large exterior-grade plywood box built on a pressure-treated lumber frame, sized to fit your grill, a mini-fridge cutout, and storage compartments. Because the frame is modular, you can resize it to fit an odd-shaped patio corner without redesigning the whole structure.
Exterior-grade plywood, pressure-treated 2×4 framing, and standard hardware-store fasteners keep material costs low compared to block or stone construction. The frame accepts almost any finish afterward — paint to match your trim, stain for a natural wood look, or stone veneer or tile later if you want to upgrade the look without rebuilding the structure. Most builders finish the frame itself in a single weekend, with cladding and countertop as a separate phase.
10. Build a Simple Grilling Island
A basic island that wraps storage and counter space around your existing grill is the most forgiving project on this list for a first-time builder — no plumbing, no gas line work, no structural stone to manage. Exterior cabinet-grade plywood with marine hardware keeps material costs down; composite panel materials cost more but need essentially no maintenance afterward.
Keep the layout simple: a run of cabinets on either side of the grill cutout, a continuous counter surface across the top, and storage below for tools, a spare propane tank, and outdoor dishware. Battery-powered LED strip lights inside the cabinets make it easier to find things after dark, and cost very little to add during the build, before the doors go on.
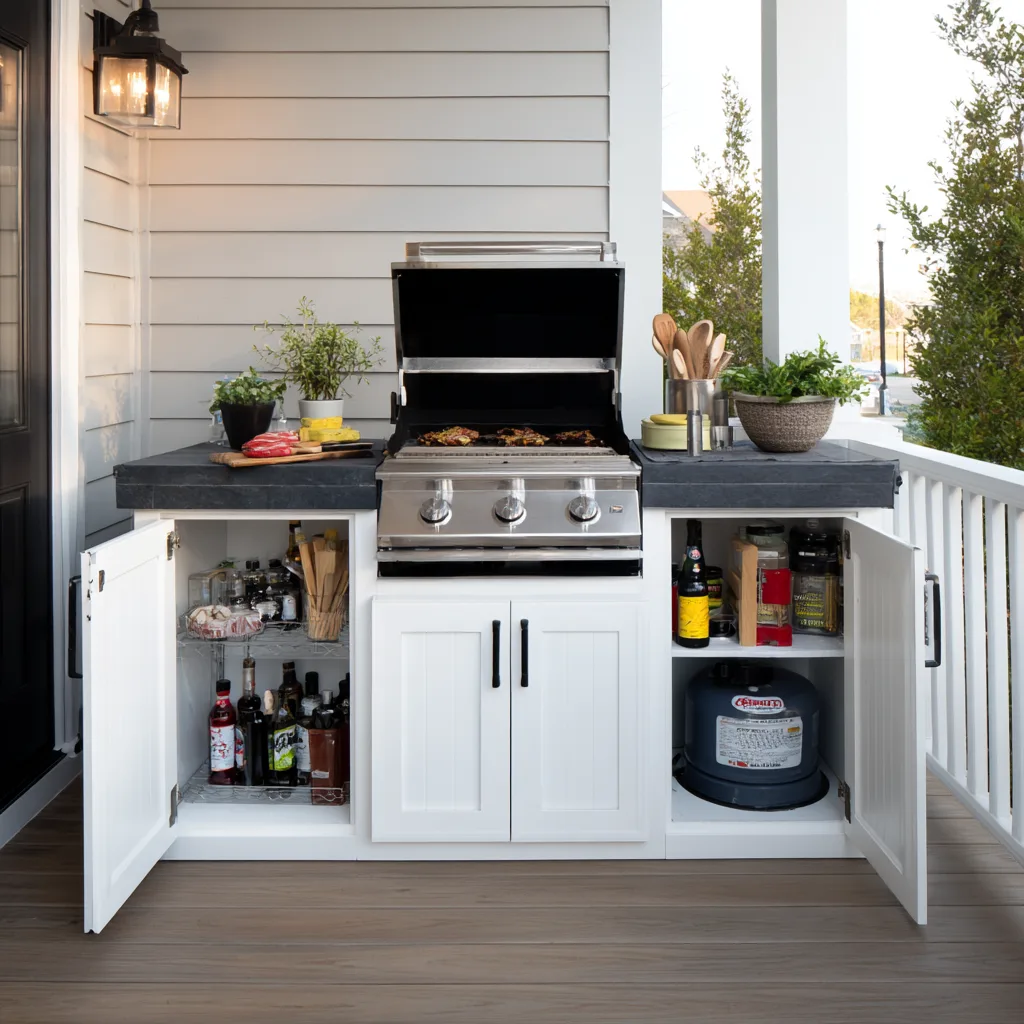
11. Repurpose Salvaged Cabinets as Cladding, Not Structure
Salvaged kitchen cabinets from a renovation or thrift store can cut material costs significantly, but there’s an important distinction to make before you build: indoor cabinet boxes are almost always particleboard or MDF, and that material swells, warps, and delaminates when it gets wet — repeatedly, over a season of rain and humidity — no matter how good a coat of marine paint you put on the surface. Paint seals the face; it doesn’t seal the cut edges and internal seams where water actually gets in.
Use salvaged cabinet boxes as cosmetic cladding over a weatherproof structural core, such as a pressure-treated frame or concrete block base, rather than as the load-bearing or weather-sealing structure itself. If you want cabinet boxes to do structural work outdoors, they need to be built from exterior-grade material like marine plywood from the start — repurposing indoor cabinets only makes sense for the doors, hardware, or a decorative face. Replace hinges and pulls with stainless steel or powder-coated hardware, which won’t rust the way standard cabinet hardware does outdoors.
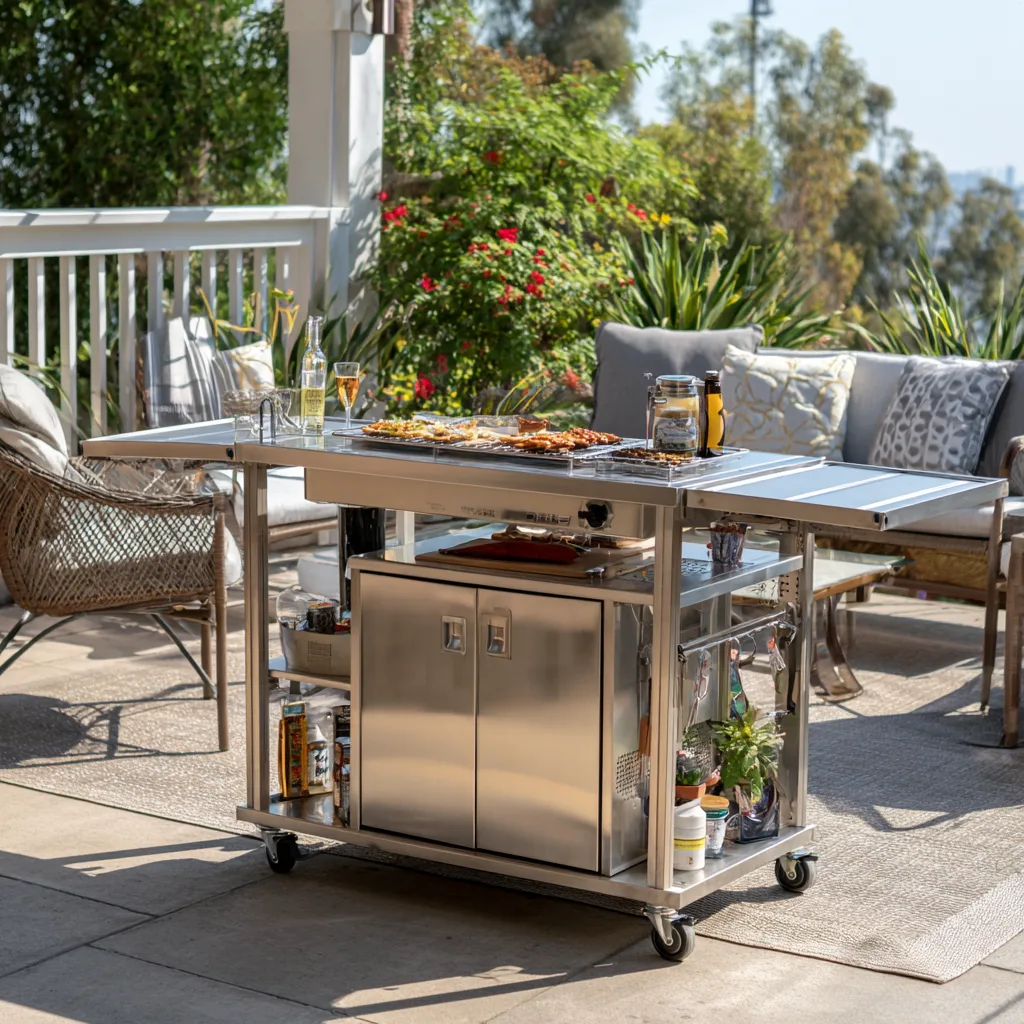
12. Build a Portable Kitchen on Casters
A cart-based kitchen on heavy-duty locking casters works well for renters or anyone who wants to test a layout before committing to a permanent build — move it to catch shade in summer or store it against a wall in winter. Fold-down side leaves double the prep surface when you need it and fold flat for storage or moving through a gate.
Use lightweight but weather-durable materials — aluminum framing, marine-grade plywood panels, stainless steel work surfaces — since every added pound has to be pushed around on wheels. If you’re running a built-in grill off a propane tank rather than a portable unit, install quick-disconnect gas fittings rather than a hard-plumbed line; it makes relocating the cart safer and means you’re not cutting and resealing a gas connection every time you move it.
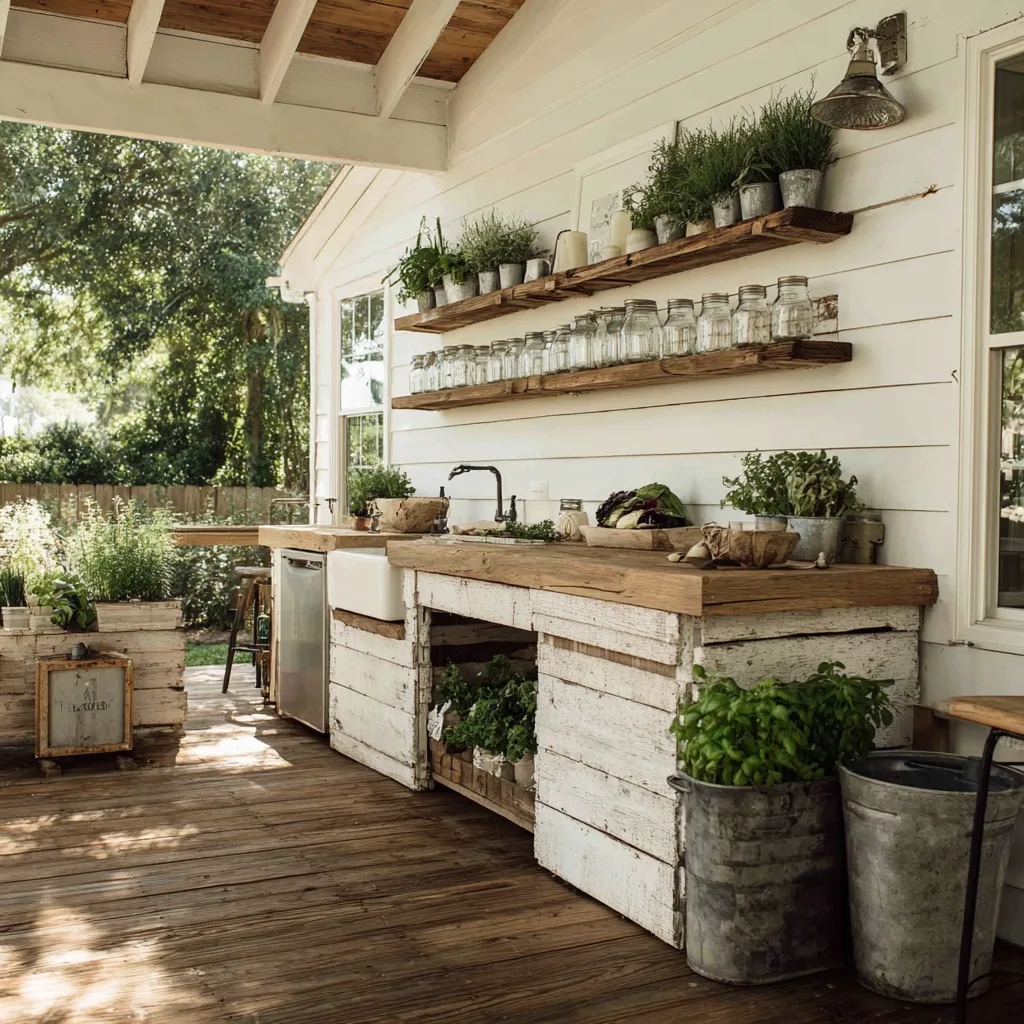
13. Build in a Farmhouse Style
A farmhouse-style build leans on reclaimed wood surfaces, galvanized metal accents, and a neutral white-and-cream palette with natural wood tones mixed in — open shelving for displaying dishware paired with closed storage for anything that needs to stay dry or out of sight. Shiplap cladding and barn-style hardware are the signature details that read as “farmhouse” rather than generic rustic.
Milk paint or chalk paint gives a chalky, slightly uneven finish that reads as intentionally worn rather than simply old — standard exterior paint looks too uniform for this style. As with any reclaimed material, weathering is the aesthetic goal here, but the wood still needs an actual weather-resistant sealer underneath the distressed look, or it deteriorates rather than just looking aged.
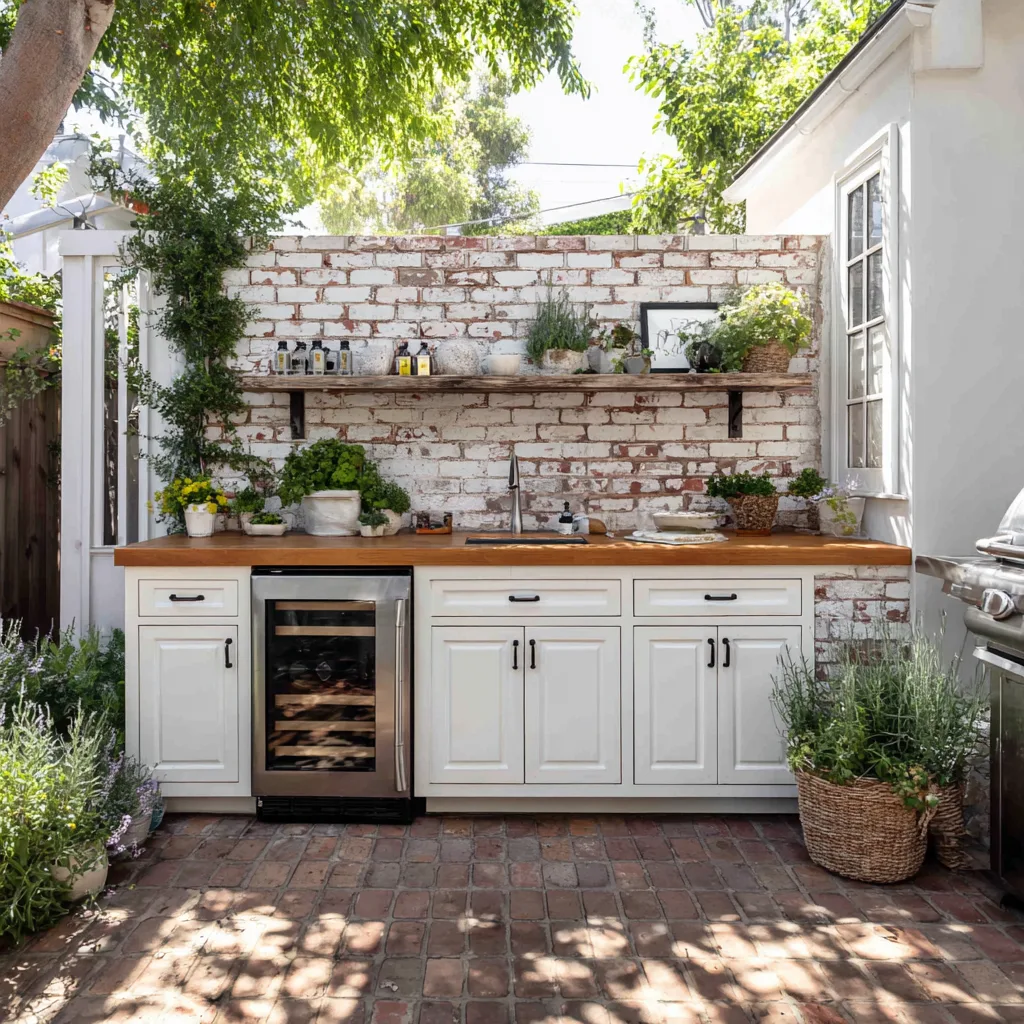
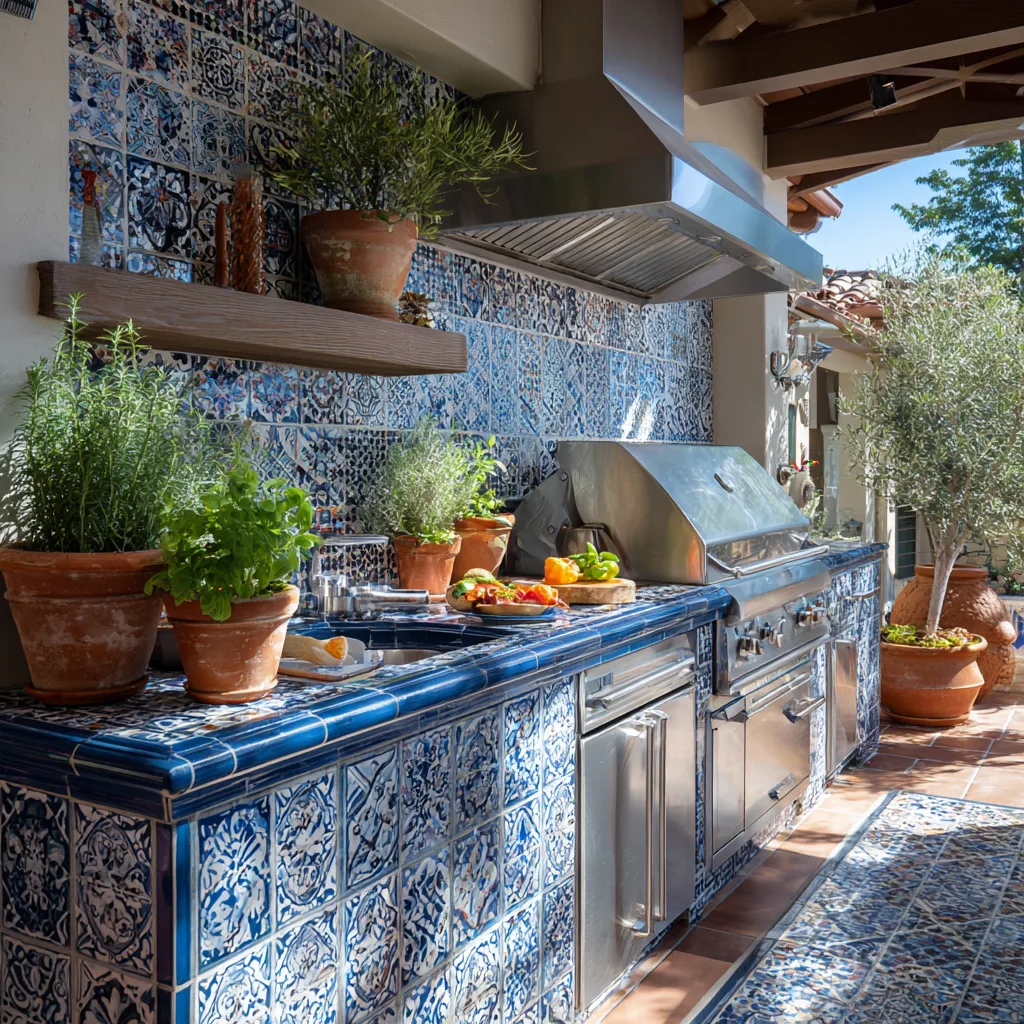
14. Add Color With Tile
Tile is one of the only ways to introduce real pattern and saturated color to an outdoor kitchen while keeping a fully weatherproof surface. Porcelain tile is denser and less porous than ceramic, which makes it more freeze-thaw resistant and the better choice outside a mild climate; natural stone tile costs more but develops a patina over time that manufactured tile can’t replicate.
The failure point for outdoor tile usually isn’t the tile itself — it’s what’s behind it. Waterproof the substrate before tiling, use grout and sealer rated for exterior and freeze-thaw exposure rather than standard interior products, and leave expansion joints if you’re in a climate with real temperature swings, since tile and grout that can’t move slightly will crack. Large-format tile in a single neutral tone reads as more contemporary; a smaller bold pattern like Moroccan tile works best as an accent band rather than the entire surface.
15. Add a Wood-Fired Pizza Oven
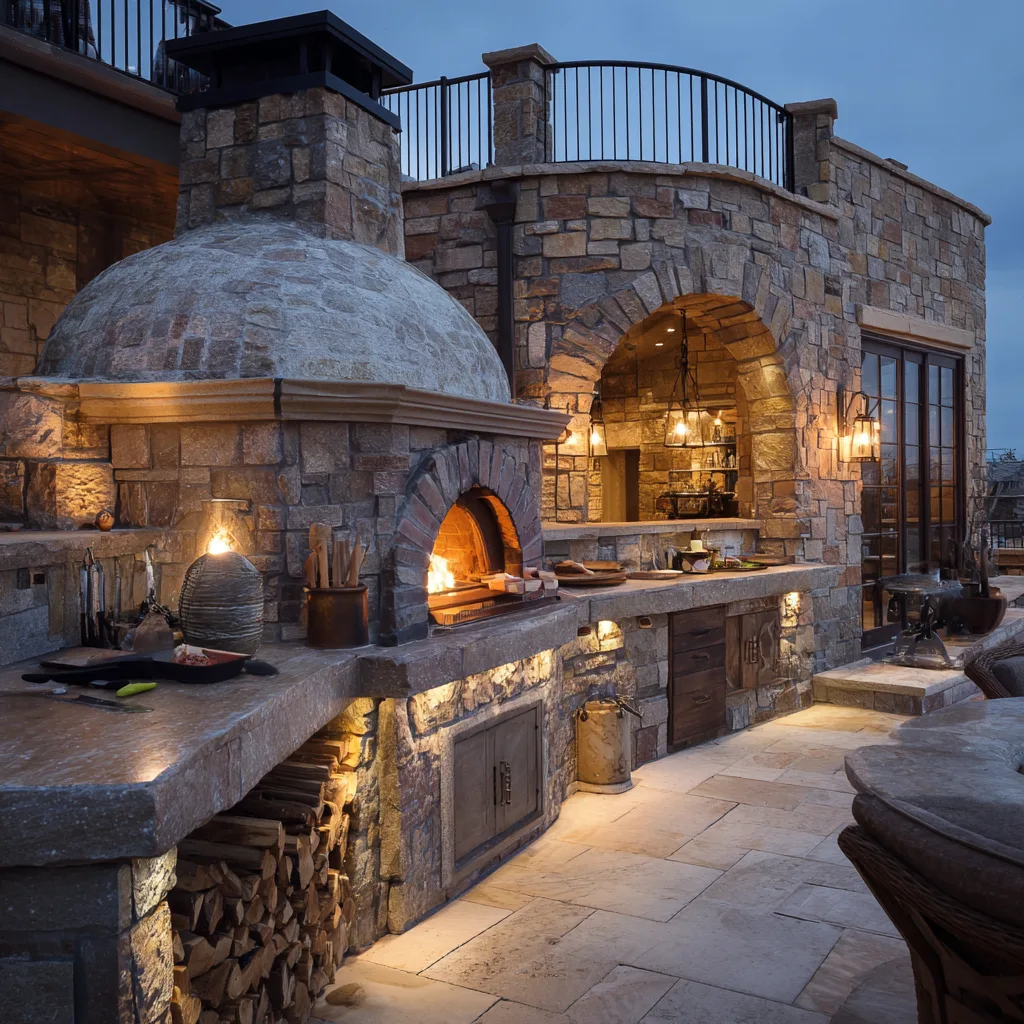
A prefabricated dome oven insert, built into a custom masonry or stucco surround, is the realistic DIY path to a wood-fired oven — building the dome itself from scratch is a specialized masonry skill most DIYers should skip in favor of a kit. The oven needs a substantial concrete footing to support its weight and a properly sized chimney or flue to draw correctly; an undersized flue is the most common reason a DIY pizza oven smokes instead of cooking cleanly.
Keep a dedicated, covered storage spot for firewood near the oven — wet or damp wood is the single biggest cause of excessive smoke and uneven cooking temperatures. Fire brick or refractory material lines the cooking chamber itself; the exterior surround (stucco, stone, or brick) is just cladding and can match whatever material you used elsewhere in the kitchen.
Conclusion
Building your own outdoor kitchen doesn’t require an all-or-nothing budget or a single weekend. A basic grilling island and a full stone-clad build with a pizza oven sit at opposite ends of the same spectrum, and there’s a reasonable starting point somewhere between them for most budgets and skill levels.
The details that matter most across every version of this project are the same: use exterior-rated materials for anything structural, plan clearances around the grill before you build, and budget for the finishing steps — sealing, resealing, annual maintenance — that keep the kitchen looking good past its first summer. Start with a design that matches your current skill level and expand later; a simple island built now beats an elaborate plan that never gets past the sketch stage.
Frequently Asked Questions
How much does it typically cost to build a DIY outdoor kitchen?
Costs vary widely by size, materials, and appliances — a basic portable cart can run around $500 in materials, while an elaborate built-in design with premium appliances can reach $8,000 or more. Most DIY builders land around $2,000-4,000 for a substantial island with storage, a concrete countertop, and mid-range appliances. Building in phases and doing your own labor are the two biggest cost levers.
What permits do I need for an outdoor kitchen installation?
Permit requirements vary by location, but most jurisdictions require permits for electrical work, plumbing connections, and permanent structures over a certain size. Gas line installation should be done by a licensed professional and typically requires a permit regardless of location. Check with your local building department before you start — a simple structure with no utilities run to it often doesn’t need a permit, but it’s worth confirming rather than assuming.
How do I protect my outdoor kitchen from weather damage?
Start with material selection: marine-grade hardware, exterior-rated wood, and weatherproof finishes from the beginning cost less than repairing water damage later. After that, it’s maintenance — appliance covers, annual resealing of wood and concrete, and drainage that moves water away from the base rather than letting it pool. In climates with hard winters, removable or coverable components let you protect anything that isn’t built to handle a freeze-thaw cycle.
Can I build an outdoor kitchen if I’m a beginner DIYer?
Yes — the simpler grilling islands and portable cart designs are realistic first projects, since they rely on basic carpentry and standard lumber sizes rather than masonry or plumbing skills. The plywood-frame build and the repurposed-cabinet approach are both reasonable starting points. Bring in an experienced friend or a professional for concrete block work, gas line connections, or electrical runs — those are the parts where a mistake is expensive or unsafe to fix later.