A poorly matched monitor stand can leave a screen leaning forward, a desk marked by a clamp, or a carefully arranged workstation pulling your neck into an awkward angle. A useful monitor stand buying guide separates three decisions that beginners often combine: raising a screen, positioning it, and carrying its load.
Compatibility is not just whether a monitor has VESA holes or whether a stand lists enough weight; the mounting pattern, screw fit, center of gravity, desk construction, cable forces, and the user’s seated eye line determine whether the setup remains stable and ergonomic. Flat-pack hardware should be evaluated before finish because a handsome stand with vague fasteners is still a poor piece of office furniture.
Key Takeaways
- Match the VESA pattern, screw fit, monitor weight, mounting orientation, and stated load range before buying.
- Check how a clamp, grommet, or freestanding base transfers force into the desk and how cables may pull the display.
- Set screen height from your actual seated posture, viewing distance, lenses, keyboard position, and available cable space.
Beginner: Start with the job the stand must do
Step 1: Decide whether you need height, movement, or support
A monitor riser raises a display with a shelf or platform. The screen remains on its original base, so the riser suits a setup where the current monitor stand is stable and the main problem is insufficient height. A simple riser can also create storage space underneath, although that space must not force a laptop, keyboard, or cables into a cramped position.
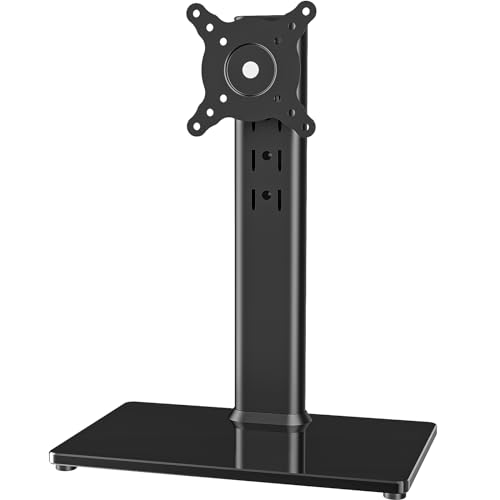
A monitor arm attaches to the display and holds it away from the desk on a fixed or movable structure. An arm can free more desk surface and allow changes in viewing position, but its mounting method transfers force into the desktop. A monitor stand with an adjustable column sits between those ideas: the display attaches to a vertical support, while the column changes height without necessarily offering the full movement of an arm.
A monitor riser raises a screen without changing the monitor’s original mounting hardware. That distinction matters because a riser can be unsuitable if the original base already occupies the desk area or if the display’s center of gravity sits too far forward.
The least complicated structure that solves the actual problem is usually best. If the screen only needs raising, a riser avoids unnecessary clamps, joints, and fasteners. If the screen must move aside for writing or must share space with a laptop, an arm or adjustable column may justify the additional hardware.
Step 2: Establish the seated eye line
Monitor height should be assessed with the user seated in the actual working posture, not while standing beside an empty desk. Sit in the chair used for work, place the keyboard and mouse where they normally sit, and look at the screen from the distance you will actually use. The viewing line should feel natural rather than forcing the chin upward or the head downward.
Raising a screen without considering viewing distance, bifocal lenses, or neck angle can create a new ergonomic problem. Someone using bifocal or progressive lenses may need a different screen position from someone using single-focus lenses, because the useful part of the lens changes the comfortable head angle.
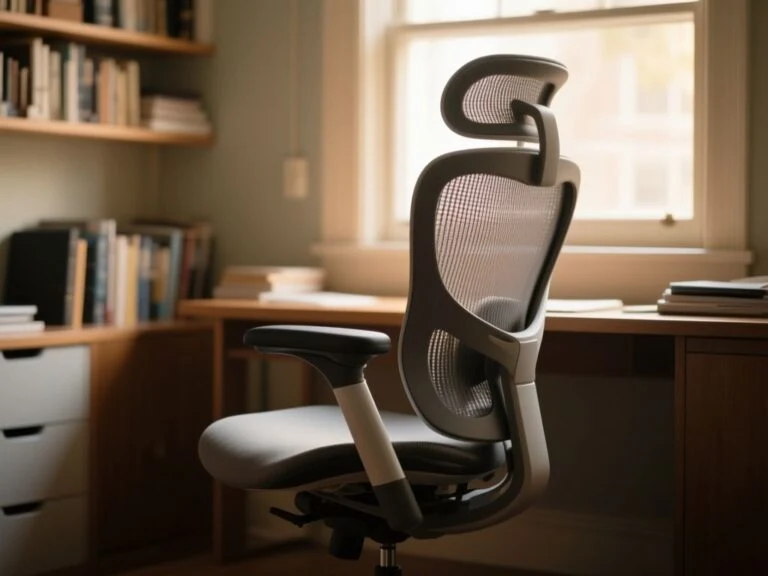
Screen height also interacts with desk ergonomics. A riser that places the display correctly can still leave the keyboard too high, while an arm that clears the desk can put the monitor too far away after its cables are routed. For chair selection and overall workstation posture, the office chair guidance for arranging a supportive desk setup belongs in the same planning stage.
The screen should be positioned only after the chair, desk, keyboard, and viewing distance are settled. That sequence prevents a stand from becoming a substitute for correcting the rest of the workstation.
Step 3: Check the display before checking the stand
Measure a screen from one corner to the opposite corner to determine its display size. That diagonal figure helps describe the monitor, but it does not tell you whether a mounting structure can carry it safely.
The back of a computer monitor may contain four threaded holes that form its VESA mounting interface. The VESA Flat Display Mounting Interface, or VESA FDMI, gives manufacturers a common way to describe those holes, but a VESA label alone is not proof of a complete fit.
The pattern must match the plate, and the plate must accept the correct screws at the required depth. The monitor’s weight, mounting orientation, and the stand’s stated load range must match as well.
A VESA mounting pattern is only one part of compatibility. Screw diameter, thread type, screw depth, plate shape, cable access, and the position of the mounting holes all deserve a line-by-line check against the manufacturer listing.
Beginner: Match the stand to the desk and the load
Step 4: Read load capacity as one condition, not a guarantee
A stand’s load rating describes the load the stand is stated to support under its intended installation conditions. The rating does not guarantee safety when the desk, fasteners, VESA screws, mounting plate, or installation surface is unsuitable.
For a freestanding riser, add the monitor and its original base together when considering the load. For an arm or adjustable column, use the monitor’s weight without assuming the original base remains part of the setup. The manufacturer may present those figures differently, so the listing must be read carefully.
Heavy ultrawide and curved monitors deserve special attention because their mass may sit farther forward or extend farther to one side than a smaller flat display. A stand can meet its stated weight limit while still becoming vulnerable to forward tipping if the base is too short for the monitor’s center of gravity.
A dual-monitor arrangement adds another source of load and movement. Two displays can apply uneven force if one is much heavier, one sits farther forward, or the arms are extended to different positions. The stand must support the combined stated load in the intended arrangement, not merely the weight of each screen considered separately.
Monitor weight must be checked together with center of gravity and mounting position. A load rating alone cannot predict stability for a heavy, curved, ultrawide, or dual-monitor layout.
Step 5: Inspect the desk before choosing a clamp
A clamp or grommet mount transfers force into the desk. Desk thickness, rear clearance, surface condition, reinforcement, and the risk of crushing or scratching the desktop all matter.
A clamp needs enough clear space at the back edge for its jaws and tightening hardware. A raised rear lip, cable tray, modesty panel, or wall position can prevent the clamp from sitting squarely. A grommet mount needs an existing opening or a suitable route through the desktop, and the area around that opening must remain sound enough to carry the force.
MDF, medium-density fiberboard, can provide a useful office surface, but a thin or damaged panel should not be treated as interchangeable with solid hardwood. Tempered glass brings a different concern: a clamp or grommet may not be suitable unless the stand and desk makers specifically account for that surface. Do not drill or tighten hardware against glass based on appearance alone.
Solid hardwood, MDF, tempered glass, laminate-covered board, and other desk surfaces respond differently to concentrated pressure. A protective pad may reduce scratching, but padding does not turn an unsuitable desktop into a suitable mounting point.
Desk load capacity matters beyond the monitor’s listed weight. The desk carries the stand, display, keyboard, accessories, and the force created when an arm is moved, so a surface that feels adequate for a stationary riser may need a more careful check for an articulated arm.
Step 6: Decide whether a freestanding base is the safer arrangement
A freestanding stand avoids transferring clamp pressure into the rear edge, but the base must remain stable under the display’s actual position. Base width, depth, mass, column placement, and the screen’s center of gravity all influence the result.
Aluminum may provide a light structural material, while steel or another heavier construction may place more mass lower in the assembly; the listing must state what the stand actually uses. Plastic, acrylic, fluted polypropylene, and corrugated fiberboard are also used for display stands, and corrugated or fluted polypropylene designs can arrive as flat-packs. Material alone does not settle stability.
Tempered glass can make a stand look visually light, but the glass panel still needs appropriate support and a base that suits the monitor. A wood stand can blend into an interior more easily, yet finish cannot compensate for loose joints or poor load transfer. The priority remains the same: inspect the joining hardware, the contact points, and the instructions before admiring the surface.

Intermediate: Judge the hardware, ports, and cable route
Step 7: Treat flat-pack assembly as part of the purchase
Flat-pack monitor stands commonly depend on screws, washers, threaded inserts, hinge points, clamps, or a base-to-column connection. The finish may look polished in a listing photograph, but the assembly hardware determines whether the structure can be tightened evenly and maintained later.
Read the parts list before assembly. Confirm that every fastener has a named position, that the tool supplied matches the fastener head, and that the instructions identify which side faces forward. A screw that appears to fit can still be wrong if its thread or depth does not match the insert.
Do not force a screw into a resistant threaded insert. Resistance can indicate cross-threading, a mismatched screw, or a misaligned panel. A fastener that starts at an angle may damage the insert before the stand carries any load.
Tighten assemblies in stages rather than fully tightening one corner while the rest remains loose. The aim is even contact between parts. Follow the maker’s instructions for final tightening and avoid adding replacement screws unless their specification is confirmed.
Monitor stand hardware should be checked for thread fit, washer placement, alignment, and access before the display is mounted. Those details matter more than a smooth coating because they control how forces travel through the assembly.
Step 8: Check clearance before attaching the screen
A stand can fit the VESA holes and still create a poor workstation if its plate blocks ports or pushes cables into a sharp bend. Check the location of HDMI, DisplayPort, USB, audio, and power connections before fixing the monitor in place.
DisplayPort cables and USB-C cables may need room behind or beneath the display. USB-C Power Delivery can carry power through a single connection in a compatible setup, but the stand does not create that capability; the monitor, computer, cable, and power arrangement must support it. A stand should leave enough space for the selected cable plugs without forcing them against the column or desk.
Cable tension can pull a freestanding display out of position or twist an arm after adjustment. Route cables with enough slack for the full intended movement, then secure them so their weight does not hang directly from the monitor ports.
Port access should be considered before installation, because a VESA plate that blocks a connector can turn a simple cable change into a full remount. The manufacturer’s drawings are useful here, but the listing may not show every port position, so inspect the monitor’s own rear layout.
Step 9: Separate adjustability from stability
Adjustability describes how the screen can move or how its height can change. Stability describes how well the stand resists unwanted movement under the installed load. These qualities overlap, but neither guarantees the other.
A rigid riser may be stable but offer no useful adjustment after placement. An articulated arm may offer more movement but introduce joints that need correct tension and fasteners that need periodic checking. An adjustable column may place the display at a useful height while limiting side-to-side movement.
The more positions a stand offers, the more carefully its joints, locking points, and cable slack need to be assessed. Movement should be intentional. A screen that drifts after adjustment may indicate an incorrect load range, a loose joint, a poorly tightened fastener, or a mounting surface that is flexing.
Adjustability is useful only if the desk, fasteners, cable route, and mounting plate can hold the selected position. A stand that moves widely but sags under the display is less useful than a simpler structure that stays where it is placed.
Intermediate: Prevent wobble, tipping, and long-term trouble
Step 10: Find the cause of wobble
Wobble can begin at the base, the column, the VESA plate, the desk surface, or the clamp. A freestanding base may rock because the contact surface is uneven or because the display’s center of gravity sits beyond the supported footprint. A clamp-mounted arm may move because the desk flexes rather than because the arm joint is loose.
Start at the lowest point and inspect each connection upward. Check that the base sits flat, the column is fully seated, the fasteners are correctly placed, and the mounting plate is not tilted. Then examine the desk for flex, damage, or a clamp pad that is not making even contact.
Wobble often becomes more visible when cables pull sideways or downward. Reroute the cables before changing the arm tension, because tightening a joint cannot correct a cable that is continuously applying force.
Wobble usually signals a connection or load-path problem rather than a cosmetic flaw. Finding the first moving joint is more useful than tightening every screw at random.
Step 11: Prevent forward tipping and sag
Forward tipping occurs when the combined center of gravity moves beyond the area supported by the base or mounting structure. A long monitor, a curved panel, or an extended arm can move the load away from the desk or base even if the display remains within the listed weight range.
Sag describes unwanted downward movement at an arm joint, column, or plate. Causes can include a load outside the stated range, incorrect tension adjustment, loose hardware, a mismatched mounting screw, or a desk surface that is yielding under the attachment point.
Do not solve sag by adding random washers, longer screws, or improvised spacers. Those changes may alter screw depth or place force on a part that was not designed to receive it. Use only the hardware and adjustment method identified by the stand manufacturer.
A heavy ultrawide should be positioned close to the support structure before the final cable route is set. A dual-monitor stand should be balanced rather than arranged with both screens extended in a way that places the greatest force at one side.
Step 12: Plan dual-monitor and laptop layouts
Dual-monitor layouts need a decision about alignment before the stand is assembled. Matching screen heights may suit side-by-side work, while a laptop placed below the main display may require the keyboard and mouse to move forward or sideways.
Check whether the stand’s column, base, or clamp occupies the area needed for a laptop. A riser may create a shelf but reduce the clear space behind the keyboard. An arm may free the central desk area but still leave a clamp or grommet directly below the monitor.
Two screens also create more cables, more connector access concerns, and more opportunity for one cable to pull a display out of line. DisplayPort and USB-C arrangements should be planned before the monitors are attached, especially where a laptop is part of the layout.
A dual-monitor stand must be assessed for combined load, spacing, center of gravity, and cable tension. Treating two screens as two unrelated installations can hide the force created by their shared column or base.
Advanced: Choose materials and maintain the assembly
Step 13: Compare materials by structure, not fashion
Wood, metal, glass, and plastic each describe a material family rather than a complete quality verdict. MDF can be flat and consistent but needs appropriate support at its edges and fastener points. Solid hardwood may suit a traditional desk, though the mounting hardware still determines whether the structure remains square.
Aluminum can keep a stand visually light and may appear in columns or arms, but the joints and attachment points remain the parts to inspect. Tempered glass can provide a clean platform, but its compatibility with clamps, grommets, screws, and concentrated pressure must be established before installation.
Plastic, acrylic, fluted polypropylene, and corrugated fiberboard can be used in monitor risers and flat-pack stands. Their presence does not automatically indicate failure, just as a metal finish does not automatically indicate stability. Look for clear load information, a sensible base, defined fasteners, and instructions that explain assembly.
Material selection should follow the desk and monitor layout. A light display on a stable platform may suit a simple riser, while a heavy or extended display demands closer attention to the base, column, mounting plate, and desk connection.
Step 14: Understand standards without treating them as a fit guarantee
VESA FDMI describes the mounting interface used for flat-panel displays, while VESA MIS-D 75 and MIS-D 100 identify mounting patterns. Those terms help you compare the monitor’s rear hole spacing with the stand’s plate, but they do not confirm screw depth, weight, orientation, desk strength, or cable clearance.
The UL organization publishes information about its standards and certification work, but a product’s listing should state exactly what has been assessed and under which conditions; a generic reference is not permission to assume certification.
The International Organization for Standardization provides the standard’s formal context, while the user’s seated posture still determines whether a particular height and viewing position are suitable.
Standards terminology is useful evidence, not a replacement for installation checks. A compliant mounting interface cannot repair a damaged desk, an incorrect screw, or a base that is too small for the load.
Step 15: Budget for ongoing costs
The initial price is only one part of ownership. Ongoing costs can include replacement fasteners, protective pads, cable-management parts, a compatible mounting plate, or a desk reinforcement solution if the original attachment point is unsuitable.
A damaged desktop may cost more to repair than the difference between a compatible freestanding base and a poorly matched clamp. A lost or incorrect screw can also delay installation or lead someone to improvise with hardware that changes the mounting depth.
Maintenance is usually simple, but it must be deliberate. Dust the base, column, and cable channels with a suitable dry or lightly damp cloth, following the material maker’s cleaning instructions. Avoid treating a glass, wood, plastic, or coated metal surface as interchangeable.
Check accessible screws, clamp pads, column joints, and VESA fasteners after the stand has been moved or the monitor position has changed. Look for movement, fresh gaps between parts, a tilted plate, damaged desk material, or cables pulling against ports.
A monitor stand has ongoing costs whenever its installation damages the desk or requires unlisted replacement hardware. Preventive inspection protects both the furniture and the display connection.
Step 16: Use a final installation sequence
Set the empty stand on the desk first and confirm that its base or mounting point occupies the intended space. Next, compare the monitor’s VESA pattern, screw fit, and orientation with the plate before lifting the display into position.
Attach the display with the screen supported and the hardware aligned. Do not let the cable bundle hang from the ports while the mounting screws are being tightened. Once the display is secured, route DisplayPort, USB-C, power, and other cables with enough slack for the intended adjustment.
Place the chair in its normal working position, adjust the screen height and viewing distance, and then check the keyboard, mouse, and laptop positions. A screen that looks centred from across the room may still be poorly placed from the working seat.
Finish by checking for forward lean, side movement, joint sag, desk damage, blocked ports, and cable tension. The stand is ready only when the complete arrangement remains compatible, stable, and usable.
Frequently Asked Questions
What is the difference between a monitor riser, a monitor arm, and a stand with an adjustable column?
A riser supports the monitor’s existing base and mainly adds height. An arm attaches to the monitor and allows repositioning, but its clamp or grommet transfers force into the desk. An adjustable-column stand attaches to the display and changes height through a vertical support. Choose by the movement you need, the desk attachment the surface can accept, and the load the structure is stated to carry.
How do I know if a VESA monitor arm will fit my monitor?
Four threaded holes alone do not prove compatibility. Port position and the plate’s shape also matter if the rear connections sit close to the mounting area.
How much weight does a monitor stand actually need to support?
Use the monitor’s listed weight and follow the stand maker’s definition of capacity. A freestanding riser may need to carry the monitor and its original base, while an arm usually carries the display without that base. Check combined load for dual monitors, then consider center of gravity, extension, cable tension, and the desk attachment. The rating is conditional.
Can a clamp or grommet mount go on any desk?
No. A clamp or grommet transfers force into the desk, so thickness, rear clearance, surface condition, reinforcement, and resistance to crushing or scratching must be checked. MDF, solid hardwood, and tempered glass should not be treated as equivalent mounting surfaces. Follow the stand and desk maker’s instructions, and do not drill or clamp a surface whose construction is unknown.
When is a simple riser better than an adjustable arm?
A riser is the cleaner choice when the monitor already has a stable base, the screen only needs raising, and you do not need to move it aside. It avoids clamp pressure and arm-joint adjustments. An arm earns its complexity when desk space, shared viewing positions, or frequent repositioning matter. The riser still needs a suitable footprint, load capacity, cable route, and viewing height.
For related home-office planning, the Wall Mirror Buying Guide offers a useful reminder that wall and desk objects need proportion, clearance, and secure fixing rather than surface appeal alone.