Could a bedroom wall feel more finished without becoming visually busy? Board and batten wall ideas for bedrooms work best when the battens relate to the bed, trim, openings, and sightlines rather than being spaced in isolation. Measure the opening first. The useful distinction is between designing the rhythm of the wall and just adding strips to it: battens should relate to the bed, trim, openings, and sightlines rather than being spaced randomly. Material choice also changes how you install it because solid wood, MDF, and painted drywall differ in movement, edge finishing, fastening, and how cleanly the treatment can later be removed.
Key Takeaways
- Plan the wall pattern around the bed, room openings, trim, and visible sightlines.
- Choose wood, MDF, or painted drywall according to movement, edge preparation, fastening, and removal needs.
- A flat wall, careful layout, secure attachment, filler, primer, caulk, and paint create a cleaner result than strips alone.
What makes board and batten work in a bedroom?
A bedroom board and batten treatment works well when wide vertical boards and narrow strips create a deliberate visual rhythm that supports the furniture arrangement. Boards are installed vertically on the wall, while battens cover the gaps between them and add a raised pattern that catches light.
The wall needs to be reasonably flat before installation because board and batten doesn’t reliably hide major waves, loose drywall, or structural movement. Use a spirit level to check for leaning lines. A straightedge can reveal hollows that might cause battens to rock away from the surface.
Start with the bed and the sightlines
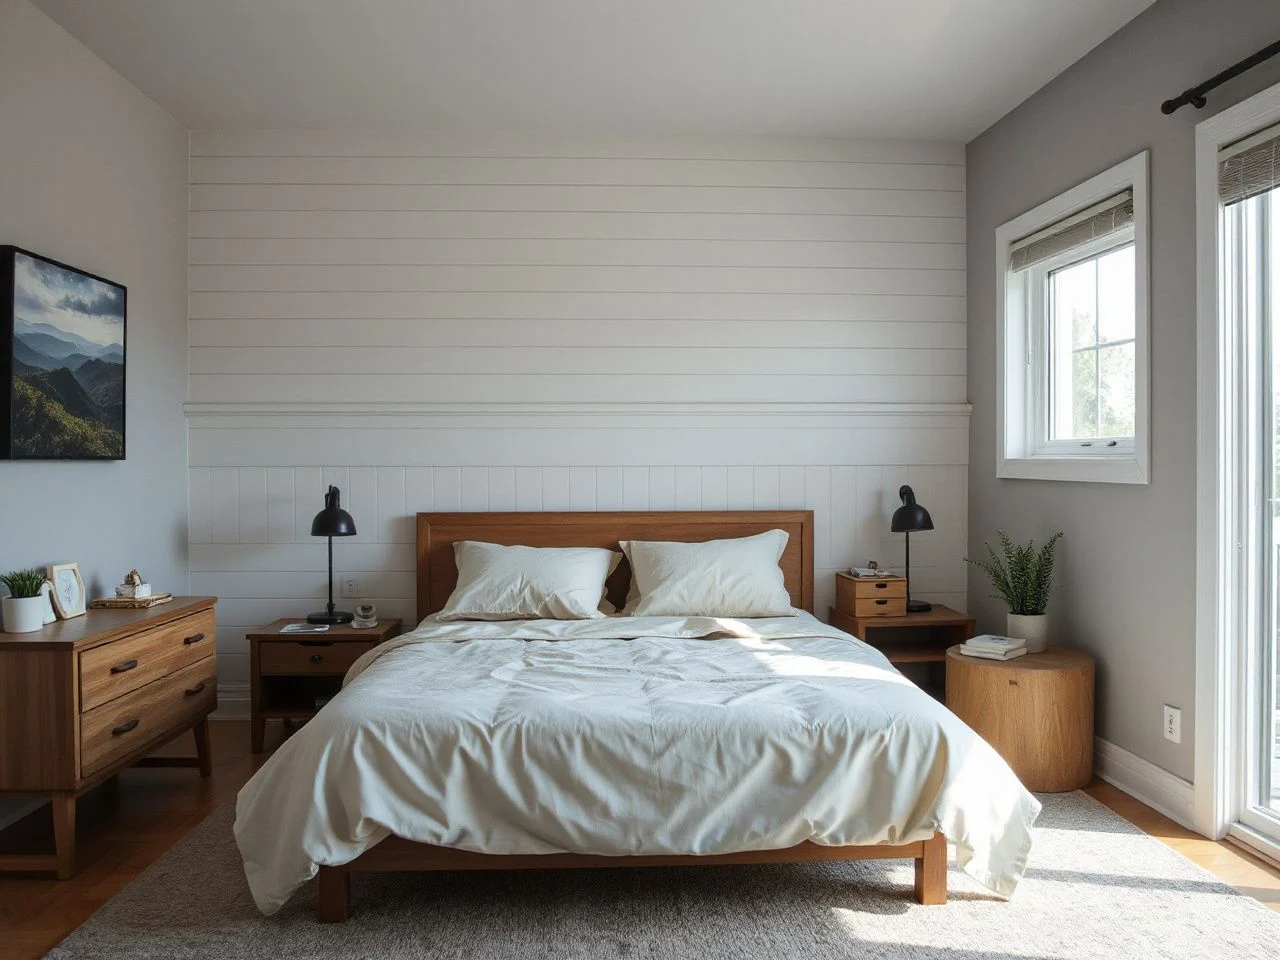
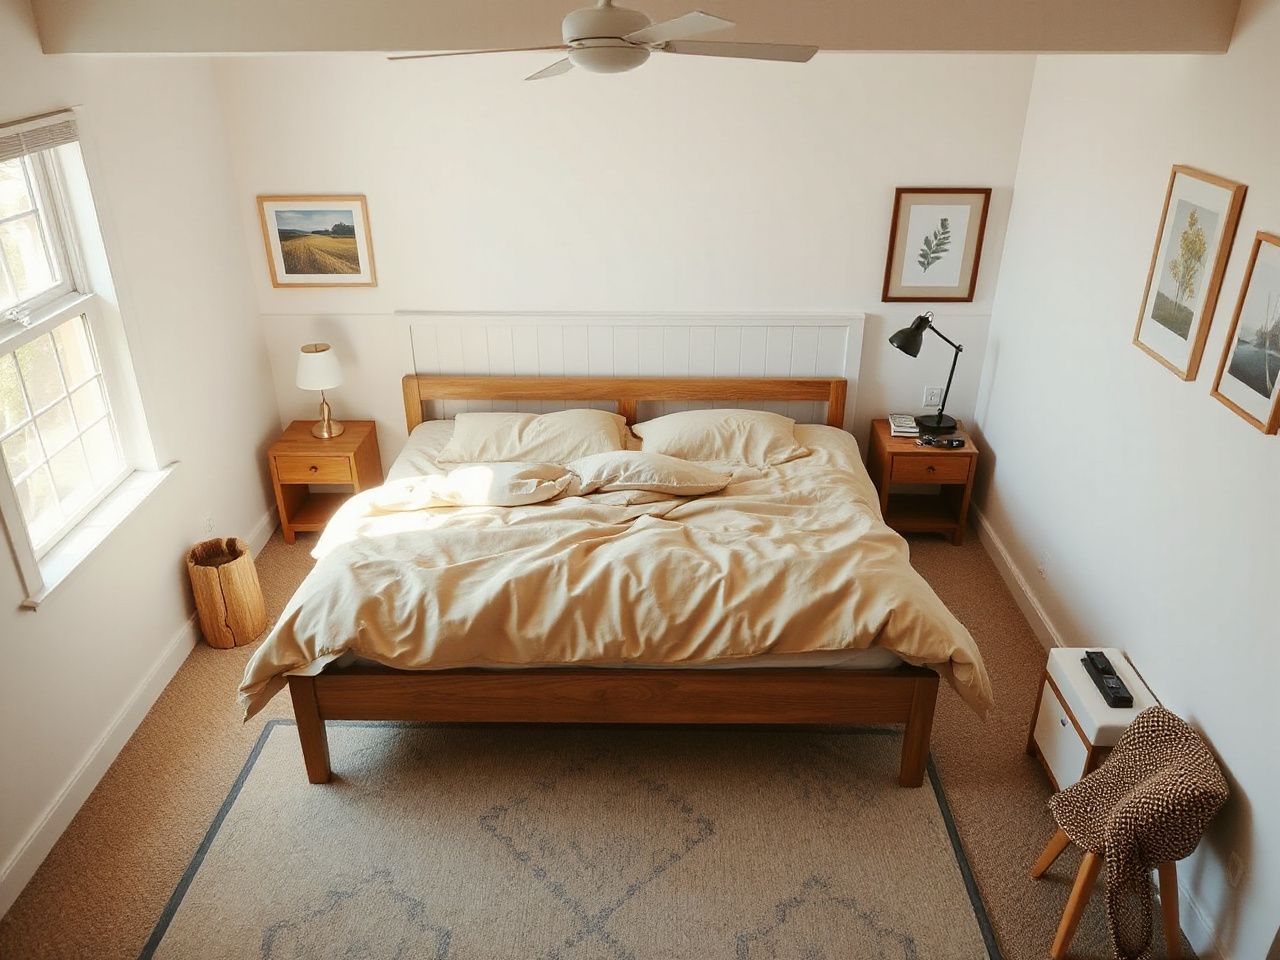
The headboard wall usually carries the strongest visual weight in a bedroom, so start by marking the bed’s centerline instead of beginning from a corner. A centered pattern can make the bed feel anchored. An awkward ending pattern beside the bed can make the whole wall look off balance.
Door casings, window casings, vents, switches, and outlets interrupt the rhythm. Treat those interruptions as part of the design. A batten may need a return, a carefully planned termination, or a layout adjustment so the wall doesn’t seem to clash with the trim.
Bedroom lighting and furniture placement also influence the outcome. A wall treatment seen from the doorway might need a different emphasis than one mainly viewed from the bed. The visible wall is the design field; the hidden part behind a large wardrobe matters less than the exposed area around the headboard.
Choose full height or partial height
A full-height treatment runs vertical lines from the baseboard toward the ceiling and can make a headboard wall feel intentional from floor to ceiling. A partial-height treatment creates a stronger horizontal stopping point, which can work well where the upper wall needs to stay quiet for art, lighting, or a softer painted field.
In a bedroom with 9 ft ceilings, trim placed at 4.5 ft reaches the exact midpoint of the wall. That midpoint can be a useful starting point for a half-wall design, but the final stopping point should also relate to the bed, windows, doors, and existing trim.
Board and batten height can affect whether wall-mounted items stay practical. Plan shelves, mirrors, art, and lighting before fixing the strips. The treatment should support how the room is used instead of making every object sit awkwardly.
Use the pattern as a bedroom accent wall
A single headboard wall often makes the strongest impact with less visual clutter. The other walls can stay painted, letting the vertical pattern frame the bed without turning every surface into a feature.
A full-room treatment can feel more architectural, but it needs consistent lines around doors, windows, corners, and electrical fixtures. For small rooms, a simple wall pattern behind the bed might keep more visual space than repeating it all over.
Simple bedroom wall ideas usually work best through proportion rather than decoration. The eye notices the gaps, the raised strips, the top edge, and how the pattern relates to the furniture before it focuses on small styling details.
How should you choose board width and batten spacing?
Board width and batten spacing should be chosen from the wall’s visible width, the bed’s position, and the locations of openings rather than from an isolated repeating grid. A pleasing pattern normally feels centered and finishes cleanly at both sides of the design area.
Draw the wall on paper or in a basic layout app. Mark the bed centerline, corners, doors, windows, outlets, switches, vents, and trim. Test several layouts by moving the battens until the strongest lines support the furniture and avoid awkward slivers beside casings.
Keep the rhythm readable
Wide boards create larger spaces between the battens, while narrow boards produce a busier rhythm. Narrow strips can suit a small treatment, but too many visible breaks may compete with bedding, art, and bedside lighting.
The most useful test is visual: stand at the bedroom entrance and look toward the wall, then view the wall from the bed. A layout that seems balanced close up can appear lopsided from the main sightline.
Board width influences how big the wall appears. Wide boards can make a space feel more calming, while closely spaced battens highlight the surface. The right choice depends on the room’s furniture and architecture, not on a fixed spacing rule.
Plan around outlets, switches, vents, and casings
Electrical outlets and switches should stay accessible and blend into the layout visually. A batten should not cover a plate, trap a fitting behind a raised strip, or leave the plate sitting awkwardly against the wall.
Door and window casings require special attention because their edges create strong vertical and horizontal guides. A batten can align with the casing, stop before it, or return into it, but the same approach should be used where that condition repeats.
Vents need clear access and an unobstructed face. When a raised treatment changes the surface around a vent, check how the vent cover, switch plate, and outlet sit against the finished wall before painting.
Electrical alterations are separate from decorative layout work. The U.S. Consumer Product Safety Commission provides consumer safety information, and readers should follow applicable instructions and use a qualified professional for electrical work that exceeds simple decorative planning.
Which material should you use for bedroom battens?
Wood boards, MDF panels, and painted drywall each have different installation and finishing challenges. Material choice should match the wall’s condition and the desired finish. I start by judging the hardware on flat-pack and ready-to-assemble pieces, and the same applies here: how you attach and treat edges affects how convincing the finish looks.
Wood boards
Wood boards show grain and can be stained or painted depending on the design. Painting downplays the grain’s importance and stain absorption, so a less expensive wood might be fine if the final finish is opaque.
Wood can respond to changes in humidity, which makes preparation at seams and exposed end grain important. End grain needs appropriate preparation before paint, and joints should be treated so small changes do not become the most noticeable feature on the wall.
Warped boards can push away from the wall or cast inconsistent shadows. Check each board against a straight reference before installation, and reject any piece that can’t sit flat without force.
MDF panels and strips
MDF provides a smooth surface that works well for painted wall treatments, but exposed edges need careful prep. Sand or seal cut edges before applying primer and paint. This prevents rough or uneven edges from showing through the finish.
MDF and wood react differently to humidity, so don’t treat their joints and edges as the same. The substrate, the material, and the paint system all need to work together for the best results.
Paintable caulk, filler, sanding, and primer are separate prep steps. Caulk handles seams, filler hides nail holes, sanding makes repairs smooth, and primer helps the paint go on evenly.
Painted drywall as an alternative
A painted drywall design can mimic the look of board and batten without sticking out as much. This can be useful when removal, dust, or furniture space matters, but it doesn’t create the raised shadow lines that real battens do.
Painted drywall also avoids some edge issues seen with cut boards and strips. Still, the surface needs to be flat and well-prepped because paint alone won’t hide loose drywall, deep waves, or structural movement.
How do you install board and batten over textured drywall?
Textured drywall needs a stable, workable surface before attaching battens. Texture can keep boards from sitting flat and may leave gaps behind narrow strips. The first step is deciding if the texture can be flattened, covered, or left so that battens can bridge it without rocking.
Step 1: Inspect the wall
Check for loose drywall, raised joints, large waves, damaged corners, and areas that sound different when tapped. Structural movement can’t be fixed with paint, and loose surfaces give fasteners a poor hold.
Use a stud finder to locate framing, then mark the spots lightly. Battens need a secure attachment to proper wall material or framing. Using only adhesive might be unsuitable for some surfaces and can make future removal more difficult.
Step 2: Decide on the backing approach
Some textured surfaces can be prepared so the boards sit more evenly. Other walls need a separate backing layer or a different treatment plan. The right choice depends on the texture, drywall condition, and how much projection the room can handle.
Don’t use battens to force a badly uneven wall into alignment. A strip that rocks, bends, or leaves a large void will show through the finished paint and reveal the problem.
Step 3: Establish the layout
Mark the top and bottom lines for the treatment then transfer vertical lines with a spirit level. Mark the centerline of the bed and work outward so the pattern stays tied to the room’s focal point.
Dry-fit boards and battens before applying construction adhesive or driving finishing nails. Dry fitting reveals conflicts around outlets, switches, vents, door casings, and windows, making changes easy while you still can.
Step 4: Attach securely
Construction adhesive can help with placement, but it might not suit every wall surface or removal plan. Use appropriate fasteners into suitable wall material or framing, and keep the attachment pattern consistent across the treatment.
Finishing nails leave small holes that need filler before painting. Nail placement should support the board and avoid creating a line of visible repairs that could draw attention after finishing.
Wall battens should sit firmly against the surface without being pulled into a curve by excessive force. Secure attachment matters more than hiding a poor fit with paint.
Step 5: Prepare and paint
Fill nail holes and let the filler dry according to its instructions. Sand the repaired areas until the surface feels level. Apply paintable caulk to seams where the board meets the wall or trim, then prime the surface before applying interior wall paint.
Caulk should go on after the pieces are attached and before the final paint coats. Filler and caulk serve different purposes, so you shouldn’t swap one for the other.
Uneven paint sheen often results from inconsistent surface prep. If a repaired area lacks primer, it can absorb paint differently from the surrounding surface. This leaves a visible patch, even when the color matches.
For a broader visual reference, the guide to board and batten interior walls can help compare full-height and partial-height treatments before finalizing the bedroom layout.
Why do gaps appear after installation?
Gaps happen when the wall, boards, battens, or fasteners don’t hold a consistent relationship after installation. A textured or uneven wall can leave voids behind the strips. Wood and MDF respond differently to humidity and can expose poorly prepared joints.
Wall movement and uneven surfaces
A batten attached over a high spot might sit tightly at one point but float at another. If placed over a hollow, a batten can flex or pull away, especially if fasteners don’t reach a good wall material or framing.
Loose drywall and structural movement should be fixed before decorative work starts. Board and batten is a finishing layer, not a fix for a moving wall.
Material movement and exposed edges
Wood and MDF can react differently to humidity, so seams and exposed edges need appropriate preparation before painting. A joint that looks acceptable before finishing may become more visible once the wall receives a consistent paint color and sheen.
Make sure the edges of the treatment are intentional. A clean return into trim looks planned, but a narrow leftover strip next to casing can seem like an unfinished layout issue.
Removal and future updates
Future removal depends on how the treatment was attached. Adhesive can make separation more difficult and may damage drywall. Fasteners leave holes that need filling and sanding.
Take a photo of the wall before covering it up. Record the positions of outlets, switches, and framing marks. This can make future changes easier, especially if the finished surface hides the original layout.
Decide on the removal method before installing. A treatment that can be taken off in sections is usually easier to update. Broadly bonded surfaces to fragile walls are harder to remove cleanly.
How does board and batten compare with other bedroom wall treatments?
Board and batten creates a raised vertical rhythm. Picture-frame molding forms framed panels. Shiplap emphasizes horizontal lines. Wallpaper offers pattern without the physical projection. The right choice depends on how much texture, maintenance, and future changes the bedroom can handle.
Picture-frame wall molding
Picture-frame molding creates repeated rectangular outlines and can suit a formal or tailored bedroom. Board and batten usually creates a stronger vertical direction, which can help focus attention on a headboard wall.
A picture-frame layout may require more attention to corner returns and rectangle proportions. Board and batten mainly focuses on vertical rhythm and the top or bottom stopping line.
Shiplap and other wall paneling
Shiplap and similar wall paneling establish horizontal movement and can support coastal, relaxed, or farmhouse-inspired rooms. Board and batten offers vertical lines and raised intersections, affecting ceiling height and furniture relationships.
Paneling may still need careful work around outlets, windows, doors, vents, and trim. No decorative surface completely eliminates the need for a flat wall and thoughtful layout.
Wallpaper
Wallpaper can add pattern without creating raised strips. This might make future changes easier if the wall is prepared properly. A board and batten treatment creates a more architectural surface but needs fastening, edge prep, and removal planning.
Paint color choice matters with every option. A quiet color can let the wall pattern stand out. A stronger color can make the battens look like a more prominent architectural feature.
For more layout context, read these bedroom layout ideas for better flow before deciding which wall should carry the treatment.
How do you keep a board and batten bedroom wall practical?
A painted board and batten wall is easiest to maintain when the seams are sound. The paint surface should be washable according to its product instructions. Raised details shouldn’t trap dust awkwardly. Routine visual checks are enough for care.
Use a soft cleaning method suitable for the wall paint. Avoid saturating seams or unfinished edges. Dust can gather on horizontal ledges, the top edge, and trim transitions. Those areas need attention during regular room cleaning.
Bedside tables, lamps, art, and storage should not press against fragile corners or force objects into the battens. Furniture placement can protect the finish and keep the wall’s rhythm visible.
A damaged section needs assessment by cause before repair. A loose batten, a moving seam, and a small nail hole each require different responses. Covering problems with paint alone might leave the underlying issue unaddressed.
Mounting objects needs planning because the height and construction of the treatment may influence where hardware can go. If a gallery arrangement is part of the design, review how wall layout changes the result of a gallery wall before fixing battens around it.
Common design directions for bedrooms
Modern board and batten designs often rely on clean lines, a restrained paint palette, and careful alignment with the bed. A traditional half-wall treatment can use a distinct stopping line and a calmer upper wall, while a full-height treatment makes the headboard area feel more enveloping.
Wood board and batten can retain visible grain when the room calls for warmth. Painted MDF can provide a more uniform surface. White treatments can keep a bedroom bright. A deeper wall color can make the pattern feel quieter by reducing contrast between the boards and battens.
Small bedrooms benefit from a layout that respects limited sightlines. A single accent wall can add texture without placing a strong pattern behind every piece of furniture.
Vaulted ceilings and irregular wall shapes need a layout that follows the architecture. Forcing a rectangular grid onto a changing plane can look awkward. Stop lines, returns, and casing relationships become especially important where the ceiling does not run parallel to the floor.
A headboard wall should stay comfortable to look at from the bed. Decorative energy belongs where the room can support it. The treatment should leave lighting and furniture placement usable.
The Bottom Line
Successful bedroom board and batten design begins with the wall’s rhythm, not just a pile of strips. Center the pattern on the bed and sightlines. Plan carefully around openings and trim. Choose wood, MDF, or painted drywall based on the finish and removal approach.
A reasonably flat wall, secure attachment, and material-specific prep matter for a good finish. Filler, sanding, primer, caulk, and interior wall paint all play a role. The strongest wall treatment supports the bedroom instead of competing with it.
Frequently Asked Questions
Should a board and batten treatment cover the whole bedroom wall?
A full-height treatment can give a headboard wall a strong architectural presence. Partial height leaves more room for art, lighting, and a quieter upper wall. Use the bed, windows, doors, and trim as references. In a room with 9 ft ceilings, a 4.5 ft stopping point reaches the wall’s midpoint and can serve as a clear starting point for a half-wall layout.
Should bedroom battens be wood or MDF?
Wood offers visible grain and can suit a stained or painted finish. MDF provides a smooth painted surface but needs careful treatment at exposed edges. Wood and MDF can respond differently to humidity, so joints, end grain, and cut edges require material-specific preparation. For a fully painted treatment, grain quality and stain absorption matter less than a flat fit and clean finishing.
How do you install board and batten over textured drywall?
Inspect the texture and drywall first. Loose or uneven surfaces can prevent battens from sitting flat. Mark studs with a stud finder, establish lines with a spirit level, and dry-fit the boards around outlets, switches, vents, windows, and doors. Use construction adhesive only where suitable. Add secure fastening to the right wall material or framing. Then fill, sand, caulk, prime, and paint.
How can you update a bedroom wall treatment later?
Plan removal before installation. Construction adhesive may make separation harder and can damage drywall. Finishing nails leave holes that need filling and sanding. Attaching a treatment in manageable sections is usually easier to alter than one bonded broadly to the wall. Keep a record of hidden outlets, switches, and framing locations so later work doesn’t rely on guesswork.